When using the desktop based version of QuickBooks, it is always a nice option to be able to email your clients the invoices. It is also infinitely better if you can have those emails coming from an actual Office 365 account that you have a license and a login for. That way, the emails are more likely not to get flagged as Spam, or arrive in the Junk Email, or worse yet, get blocked altogether.
To set this up the first thing you need is an account that you can login in on Office 365 that you want to use as the address. Two points to note here. Firstly, you can’t have MFA turned on for this account, as the sending via Email in QuickBooks is fairly limited and makes a direct connection for each email sent rather than authorizing the account for use via an API function. Secondly, the good news, is that all emails that are sent from this account show up in the Sent Items, as you are basically connecting to the account and sending ‘as’ that account.
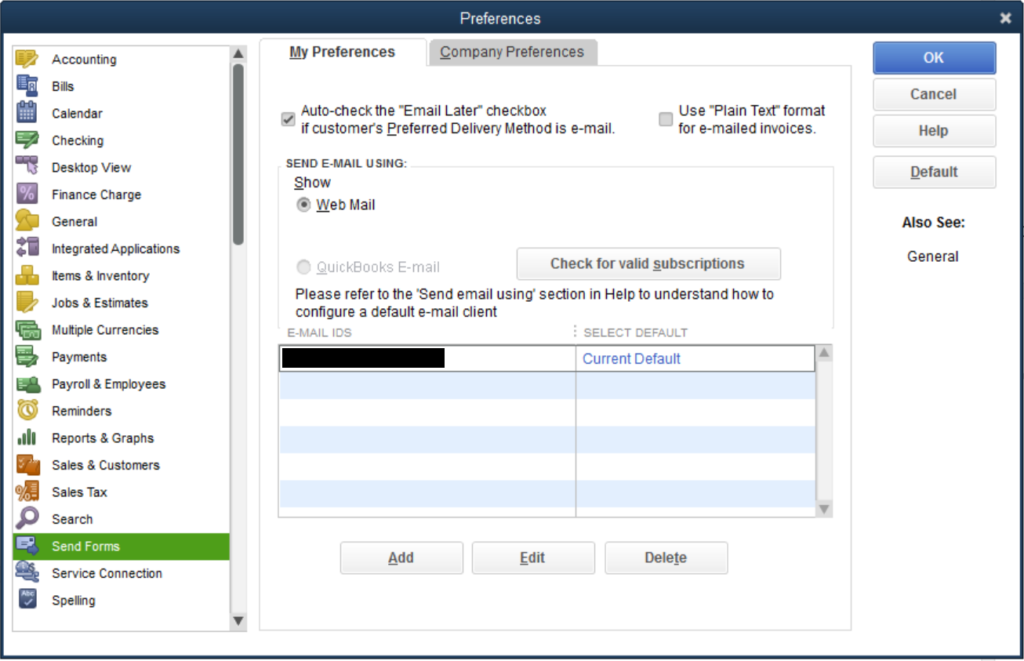
So with that done. Go into QuickBooks and under the Edit menu you will find Preferences at the bottom. Once in the preferences, select the ‘Send Forms’ from the left hand side and you will see the dialog box similar to below.

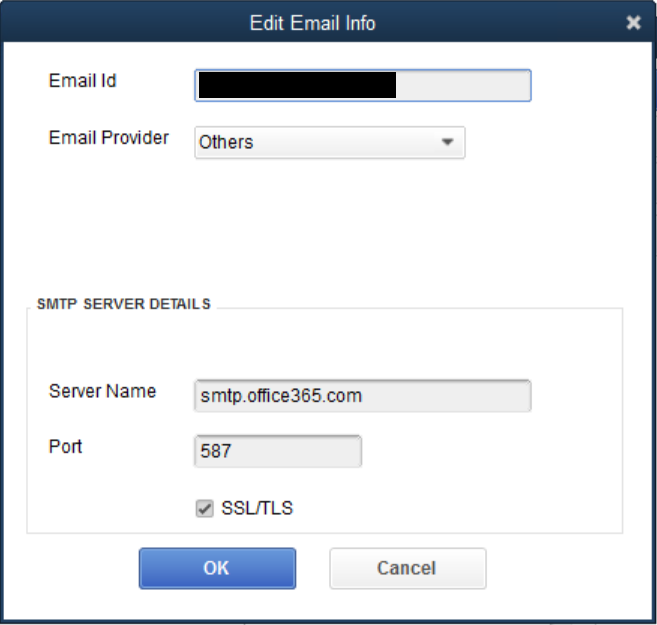
You will see any email accounts that you have setup. The important radio button here is ‘Web Mail’, select this one. I have greyed this one out for privacy, but from this point you can either ‘Add’ a new account, or you can ‘Edit’ an existing one. When you do this, the following box will appear.

The options here are fairly easy to understand, but the main points are the email address, the server name, the port and the SSL/TLS settings. Once you have entered these hit OK and you will drop back to the previous screen. Hit OK again and you will return to QuickBooks.
Note that you haven’t been asked for a password yet. This done when you send an invoice for the first time.
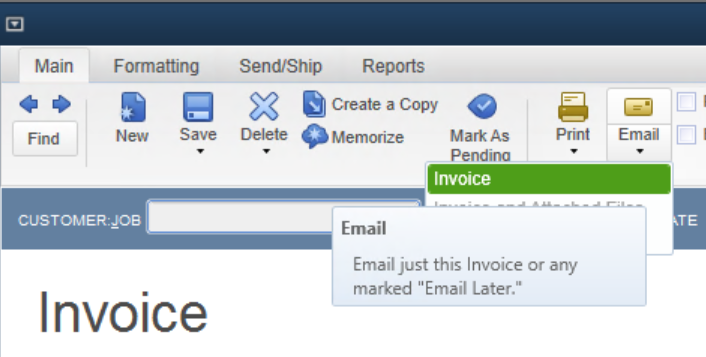
To send the invoice, you will notice that when you create one there is an ‘Email’ option at the top. Use that and you are good to go.


