
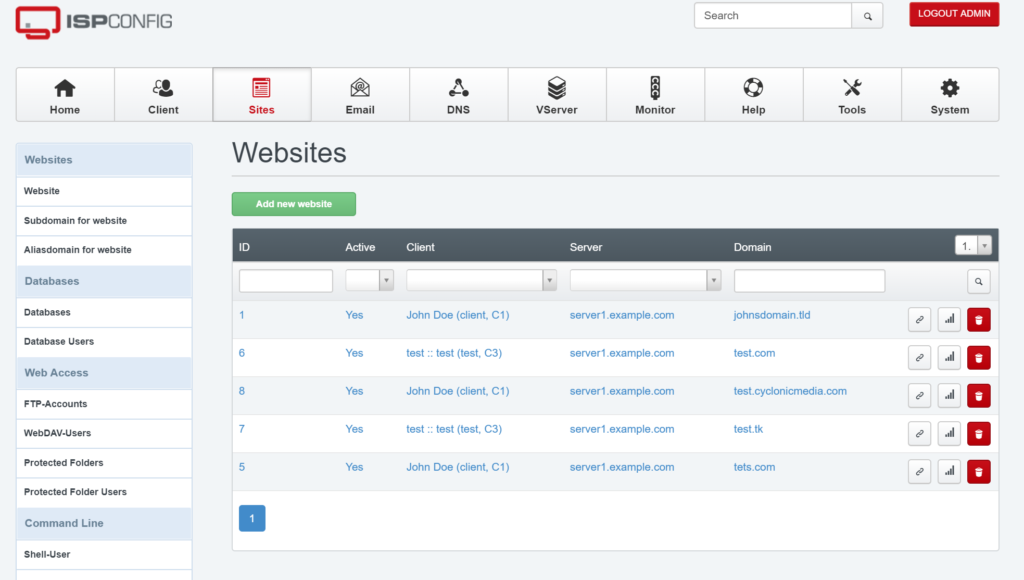
ISPConfig 3 is a Linux based hosting system to allow for multi host multi client systems on a single web server. This batch of commands to walk through means you can create this type of server very quickly and have a webserver in the cloud in under an hour. You can then add multiple websites across multiple clients. The end result is a console that looks like this….
To create the server, you need to either have one already in the cloud to use. Or maybe inside your company network, but if you don’t have one, either purchase one from Blue Host, or OVH. Links are below.

https://www.ovhcloud.com/en/vps/compare/
Once you have the server built and configured with console access, then follow this instructions to create the implementation.
yum -y install net-tools nano
systemctl stop firewalld.service
systemctl disable firewalld.service
nano /etc/hostname
Update the hostname with the FQDN for your external facing internet presence.
nano /etc/selinux/configAdd the line
SELINUX=permissive
The Reboot the server. The run the following code
rpm --import /etc/pki/rpm-gpg/RPM-GPG-KEY*
yum -y install epel-release
yum -y update
yum -y groupinstall 'Development Tools'

yum install http://rpms.remirepo.net/enterprise/remi-release-7.rpm

yum-config-manager --enable remi-php72
yum -y install ntp httpd mod_ssl mariadb-server php php-mysql php-mbstring phpmyadmin
echo "RequestHeader unset Proxy early" >> /etc/httpd/conf/httpd.conf
service httpd restart
yum -y install dovecot dovecot-mysql dovecot-pigeonhole
touch /etc/dovecot/dovecot-sql.conf
ln -s /etc/dovecot/dovecot-sql.conf /etc/dovecot-sql.conf
ln -s /etc/dovecot/dovecot.conf /etc/dovecot.conf
systemctl enable dovecot
systemctl start dovecot
yum -y install postfix
systemctl enable mariadb.service
systemctl start mariadb.service
systemctl stop sendmail.service
systemctl disable sendmail.service
systemctl enable postfix.service
systemctl restart postfix.service
yum -y install getmail
Perform the MySQL installation with this line.
mysql_secure_installationnano /etc/httpd/conf.d/phpMyAdmin.confEnter the following block in the the phpMyAdmin.conf file. There are 5 lines that need commenting out with the #.
<Directory /usr/share/phpMyAdmin/>
   <IfModule mod_authz_core.c>
     # Apache 2.4
  #  <RequireAny>
     #  Require ip 127.0.0.1
     #  Require ip ::1
  #  </RequireAny>
   </IfModule>
   <IfModule !mod_authz_core.c>
     # Apache 2.2
     Order Deny,Allow
     Deny from All
     Allow from 127.0.0.1
     Allow from ::1
   </IfModule>
</Directory>
nano /etc/phpMyAdmin/config.inc.phpEdit this file and place in the following items.
[...]
/* Authentication type */
$cfg['Servers'][$i]['auth_type'] = 'http';
[...]
Then run the following lines.
systemctl enable  httpd.service
systemctl restart  httpd.service
yum -y install amavisd-new spamassassin clamav-server clamav-data clamav-update clamav-filesystem clamav clamav-scanner-systemd clamav-devel clamav-lib clamav-server-systemd unzip bzip2 perl-DBD-mysql postgrey re2c
sa-update
freshclam
systemctl enable amavisd.service
systemctl start amavisd.service
systemctl start clamd@amavisd.service
systemctl enable postgrey.service
systemctl start postgrey.service
yum -y install php php-devel php-gd php-imap php-ldap php-mysql php-odbc php-pear php-xml php-xmlrpc php-pecl-apc php-mbstring php-mcrypt php-mssql php-snmp php-soap php-tidy curl curl-devel perl-libwww-perl ImageMagick libxml2 libxml2-devel mod_fcgid php-cli httpd-devel php-fpm php-intl php-imagick php-pspell wget
Run this command
nano /etc/php.iniAnd add the line – CGI.FIX_PATHINFO=1 as below
[...]
;error_reporting = E_ALL & ~E_DEPRECATED
error_reporting = E_ALL & ~E_NOTICE & ~E_DEPRECATED & ~E_STRICT
[...]
; cgi.fix_pathinfo provides *real* PATH_INFO/PATH_TRANSLATED support for CGI.  PHP's
; previous behaviour was to set PATH_TRANSLATED to SCRIPT_FILENAME, and to not grok
; what PATH_INFO is.  For more information on PAppp.tldTH_INFO, see the cgi specs.  Setting
; this to 1 will cause PHP CGI to fix its paths to conform to the spec.  A setting
; of zero causes PHP to behave as before.  Default is 1.  You should fix your scripts
; to use SCRIPT_FILENAME rather than PATH_TRANSLATED.
; http://www.php.net/manual/en/ini.core.php#ini.cgi.fix-pathinfo
cgi.fix_pathinfo=1
[...]
date.timezone = 'Europe/Berlin'
[...]
Run the following commands
systemctl start php-fpm.service
systemctl enable php-fpm.service
systemctl enable httpd.service
systemctl restart httpd.service
mkdir /opt/certbot
cd /opt/certbot
wget https://dl.eff.org/certbot-auto
chmod a+x ./certbot-auto
./certbot-auto

yum -y install python-devel
cd /usr/local/src/
wget http://dist.modpython.org/dist/mod_python-3.5.0.tgz
tar xfz mod_python-3.5.0.tgz
cd mod_python-3.5.0
./configure
make
sed -e 's/(git describe --always)/(git describe --always 2>\/dev\/null)/g' -e 's/`git describe --always`/`git describe --always 2>\/dev\/null`/g' -i $( find . -type f -name Makefile\* -o -name version.sh )
make install
echo 'LoadModule python_module modules/mod_python.so' > /etc/httpd/conf.modules.d/10-python.conf
systemctl restart httpd.service
yum -y install pure-ftpd
systemctl enable pure-ftpd.service
systemctl start pure-ftpd.service
yum install openssl
nano /etc/pure-ftpd/pure-ftpd.conf
Inside the pure-ftpd.conf file add the TLS line
[...]
# This option can accept three values :
# 0 : disable SSL/TLS encryption layer (default).
# 1 : accept both traditional and encrypted sessions.
# 2 : refuse connections that don't use SSL/TLS security mechanisms,
#     including anonymous sessions.
# Do _not_ uncomment this blindly. Be sure that :
# 1) Your server has been compiled with SSL/TLS support (--with-tls),
# 2) A valid certificate is in place,
# 3) Only compatible clients will log in.

TLS                      1
[...]
Run the following blocks.
mkdir -p /etc/ssl/private/
openssl req -x509 -nodes -days 7300 -newkey rsa:2048 -keyout /etc/ssl/private/pure-ftpd.pem -out /etc/ssl/private/pure-ftpd.pem
chmod 600 /etc/ssl/private/pure-ftpd.pem
openssl dhparam -out /etc/ssl/private/pure-ftpd-dhparams.pem 2048
systemctl restart pure-ftpd.service
yum -y install bind bind-utils haveged
cp /etc/named.conf /etc/named.conf_bak
cat /dev/null > /etc/named.conf
nano /etc/named.conf
In the named.conf file, make it look like this by just copying over the top.
//
// named.conf
//
// Provided by Red Hat bind package to configure the ISC BIND named(8) DNS
// server as a caching only nameserver (as a localhost DNS resolver only).
//
// See /usr/share/doc/bind*/sample/ for example named configuration files.
//
options {
        listen-on port 53 { any; };
        listen-on-v6 port 53 { any; };
        directory       "/var/named";
        dump-file       "/var/named/data/cache_dump.db";
        statistics-file "/var/named/data/named_stats.txt";
        memstatistics-file "/var/named/data/named_mem_stats.txt";
        allow-query     { any; };
				allow-recursion {"none";};
        recursion no;
};
logging {
        channel default_debug {
                file "data/named.run";
                severity dynamic;
        };
};
zone "." IN {
        type hint;
        file "named.ca";
};
include "/etc/named.conf.local";
Run the following block.
touch /etc/named.conf.local
systemctl enable named.service
systemctl start named.service
systemctl enable haveged.service
systemctl start haveged.service
yum -y install webalizer awstats perl-DateTime-Format-HTTP perl-DateTime-Format-Builder
nano /etc/httpd/conf.d/awstats.conf
and change the line:
Require localto:
Require all grantedRun the following block.
systemctl restart httpd.service
cd /tmp
wget http://olivier.sessink.nl/jailkit/jailkit-2.20.tar.gz
tar xvfz jailkit-2.20.tar.gz
cd jailkit-2.20
./configure
make
make install
cd ..
rm -rf jailkit-2.20*
yum -y install iptables-services fail2ban fail2ban-systemd
systemctl stop firewalld.service
systemctl mask firewalld.service
systemctl disable firewalld.service
systemctl stop firewalld.service
nano /etc/fail2ban/jail.local
Update the jail.local file to the following.
[sshd]
enabled = true
action = iptables[name=sshd, port=ssh, protocol=tcp]

[pure-ftpd]
enabled = true
action = iptables[name=FTP, port=ftp, protocol=tcp]
maxretry = 3

[dovecot]
enabled = true
action = iptables-multiport[name=dovecot, port="pop3,pop3s,imap,imaps", protocol=tcp]
maxretry = 5

[postfix-sasl]
enabled = true
action = iptables-multiport[name=postfix-sasl, port="smtp,smtps,submission", protocol=tcp]
maxretry = 3
Run the following block.
systemctl enable fail2ban.service
systemctl start fail2ban.service
yum -y install rkhunter
yum -y install mailman
touch /var/lib/mailman/data/aliases
postmap /var/lib/mailman/data/aliases
/usr/lib/mailman/bin/newlist mailman
ln -s /usr/lib/mailman/mail/mailman /usr/bin/mailman

nano /etc/aliases
Update the aliases file to look like this.
[...]
mailman:              "|/usr/lib/mailman/mail/mailman post mailman"
mailman-admin:        "|/usr/lib/mailman/mail/mailman admin mailman"
mailman-bounces:      "|/usr/lib/mailman/mail/mailman bounces mailman"
mailman-confirm:      "|/usr/lib/mailman/mail/mailman confirm mailman"
mailman-join:         "|/usr/lib/mailman/mail/mailman join mailman"
mailman-leave:        "|/usr/lib/mailman/mail/mailman leave mailman"
mailman-owner:        "|/usr/lib/mailman/mail/mailman owner mailman"
mailman-request:      "|/usr/lib/mailman/mail/mailman request mailman"
mailman-subscribe:    "|/usr/lib/mailman/mail/mailman subscribe mailman"
mailman-unsubscribe:  "|/usr/lib/mailman/mail/mailman unsubscribe mailman"
Run the following block.
newaliases
systemctl restart postfix.service
nano /etc/httpd/conf.d/mailman.conf
Make the mailman.conf file look like this.
#
#  httpd configuration settings for use with mailman.
#

ScriptAlias /mailman/ /usr/lib/mailman/cgi-bin/
ScriptAlias /cgi-bin/mailman/ /usr/lib/mailman/cgi-bin/
<Directory /usr/lib/mailman/cgi-bin/>
    AllowOverride None
    Options ExecCGI
    Order allow,deny
    Allow from all
</Directory>


#Alias /pipermail/ /var/lib/mailman/archives/public/
Alias /pipermail /var/lib/mailman/archives/public/
<Directory /var/lib/mailman/archives/public>
    Options Indexes MultiViews FollowSymLinks
    AllowOverride None
    Order allow,deny
    Allow from all
    AddDefaultCharset Off
</Directory>

# Uncomment the following line, to redirect queries to /mailman to the
# listinfo page (recommended).

# RedirectMatch ^/mailman[/]*$ /mailman/listinfo
Run the following block.
systemctl restart httpd.service
systemctl enable mailman.service
systemctl start mailman.service
cd /tmp
wget https://github.com/roundcube/roundcubemail/releases/download/1.3.9/roundcubemail-1.3.9-complete.tar.gz
tar xfz roundcubemail-1.3.9-complete.tar.gz
mkdir /usr/share/roundcubemail
mv /tmp/roundcubemail-1.3.9/* /usr/share/roundcubemail/
chown -R root:root /usr/share/roundcubemail
chown apache /usr/share/roundcubemail/temp
chown apache /usr/share/roundcubemail/logs
nano /etc/httpd/conf.d/roundcubemail.conf
Edit the roundcubeemail.conf file to look like this.
#
# Round Cube Webmail is a browser-based multilingual IMAP client
#

Alias /roundcubemail /usr/share/roundcubemail
Alias /webmail /usr/share/roundcubemail

# Define who can access the Webmail
# You can enlarge permissions once configured

<Directory /usr/share/roundcubemail/>
        Options none
        AllowOverride Limit
        Require all granted
</Directory>

# Define who can access the installer
# keep this secured once configured

<Directory /usr/share/roundcubemail/installer>
        Options none
        AllowOverride Limit
        Require all granted
</Directory>


# Those directories should not be viewed by Web clients.
<Directory /usr/share/roundcubemail/bin/>
    Order Allow,Deny
    Deny from all
</Directory>
<Directory /usr/share/roundcubemail/plugins/enigma/home/>
    Order Allow,Deny
    Deny from all
</Directory>
Run the following block.
systemctl restart httpd.service

mysql -u root -p
In the MySQL console use the following.
CREATE DATABASE roundcubedb;
CREATE USER roundcubeuser@localhost IDENTIFIED BY 'roundcubepassword';
GRANT ALL PRIVILEGES on roundcubedb.* to roundcubeuser@localhost ;
FLUSH PRIVILEGES;
exit
Run the following command.
nano /usr/share/roundcubemail/config/config.inc.phpCut and paste this over the file.
<?php

/* Local configuration for Roundcube Webmail */

// ----------------------------------
// SQL DATABASE
// ----------------------------------
// Database connection string (DSN) for read+write operations
// Format (compatible with PEAR MDB2): db_provider://user:password@host/database
// Currently supported db_providers: mysql, pgsql, sqlite, mssql, sqlsrv, oracle
// For examples see http://pear.php.net/manual/en/package.database.mdb2.intro-dsn.php
// NOTE: for SQLite use absolute path (Linux): 'sqlite:////full/path/to/sqlite.db?mode=0646'
// or (Windows): 'sqlite:///C:/full/path/to/sqlite.db'
$config['db_dsnw'] = 'mysql://roundcubeuser:roundcubepassword@localhost/roundcubedb';

// ----------------------------------
// IMAP
// ----------------------------------
// The IMAP host chosen to perform the log-in.
// Leave blank to show a textbox at login, give a list of hosts
// to display a pulldown menu or set one host as string.
// To use SSL/TLS connection, enter hostname with prefix ssl:// or tls://
// Supported replacement variables:
// %n - hostname ($_SERVER['SERVER_NAME'])
// %t - hostname without the first part
// %d - domain (http hostname $_SERVER['HTTP_HOST'] without the first part)
// %s - domain name after the '@' from e-mail address provided at login screen
// For example %n = mail.domain.tld, %t = domain.tld
// WARNING: After hostname change update of mail_host column in users table is
// required to match old user data records with the new host.
$config['default_host'] = 'localhost';

// provide an URL where a user can get support for this Roundcube installation
// PLEASE DO NOT LINK TO THE ROUNDCUBE.NET WEBSITE HERE!
$config['support_url'] = '';

// This key is used for encrypting purposes, like storing of imap password
// in the session. For historical reasons it's called DES_key, but it's used
// with any configured cipher_method (see below).
$config['des_key'] = 'pb0UucO0eqjgvhrqYlFTBVjE';

// ----------------------------------
// PLUGINS
// ----------------------------------
// List of active plugins (in plugins/ directory)
$config['plugins'] = array();

// Set the spell checking engine. Possible values:
// - 'googie' - the default (also used for connecting to Nox Spell Server, see 'spellcheck_uri' setting)
// - 'pspell' - requires the PHP Pspell module and aspell installed
// - 'enchant' - requires the PHP Enchant module
// - 'atd' - install your own After the Deadline server or check with the people at http://www.afterthedeadline.com before using their API
// Since Google shut down their public spell checking service, the default settings
// connect to http://spell.roundcube.net which is a hosted service provided by Roundcube.
// You can connect to any other googie-compliant service by setting 'spellcheck_uri' accordingly.
$config['spellcheck_engine'] = 'pspell';
$config['enable_installer'] = true;
Run this command block.
nano /usr/share/roundcubemail/config/config.inc.phpand change the line:
$config['enable_installer'] = true;to:
$config['enable_installer'] = false;Run the following block.
cd /tmp
wget -O ispconfig.tar.gz https://git.ispconfig.org/ispconfig/ispconfig3/repository/archive.tar.gz?ref=stable-3.1
tar xfz ispconfig.tar.gz
cd ispconfig3*/install/

php -q install.php
You will be guided through the setup and configuration of the ISPConfig3 system.
Easy as that. 🙂
To update the system to use PHP 7.1, run the following command.
php -v

yum remove webtatic-release -y
yum install https://centos7.iuscommunity.org/ius-release.rpm

yum remove php php-cli php-common php-fpm php-gd php-mbstring php-mysqlnd php-opcache php-pdo php-pear php-pecl-igbinary php-pecl-memcache php-pecl-memcached php-process php-xml

yum install php71u php71u-cli php71u-common php71u-fpm php71u-gd php71u-mbstring php71u-mysqlnd php71u-opcache php71u-pdo php71u-pear php71u-pecl-igbinary php71u-pecl-memcache php71u-pecl-memcached php71u-process php71u-xml php71u-json -y

php -v

systemctl is-enabled php-fpm
systemctl enable php-fpm
Lastly, in the console, if you want to install Word Press easily on any of the installed clients, use these commands.
wget https://wordpress.org/latest.tar.gz

tar -xzvf latest.tar.gz

cd wordpress
mv * ..

cd ..
rmdir wordpress

mv wp-config-sample.php wp-config.php
nano wp-config.php

Make sure that you CHOWN all the files to match ‘web2:client1’ or equivalent

Cd /var/www/blahblahblah.com
Chown -R web2:client1 web
Thank you for following along and if you have any questions or comments then please let me know.