
Well that’s a pretty boring title and an even more boring name for a script. However the output is definitely not boring as it gives a true insight into what is getting used in your Microsoft 365 tenant.
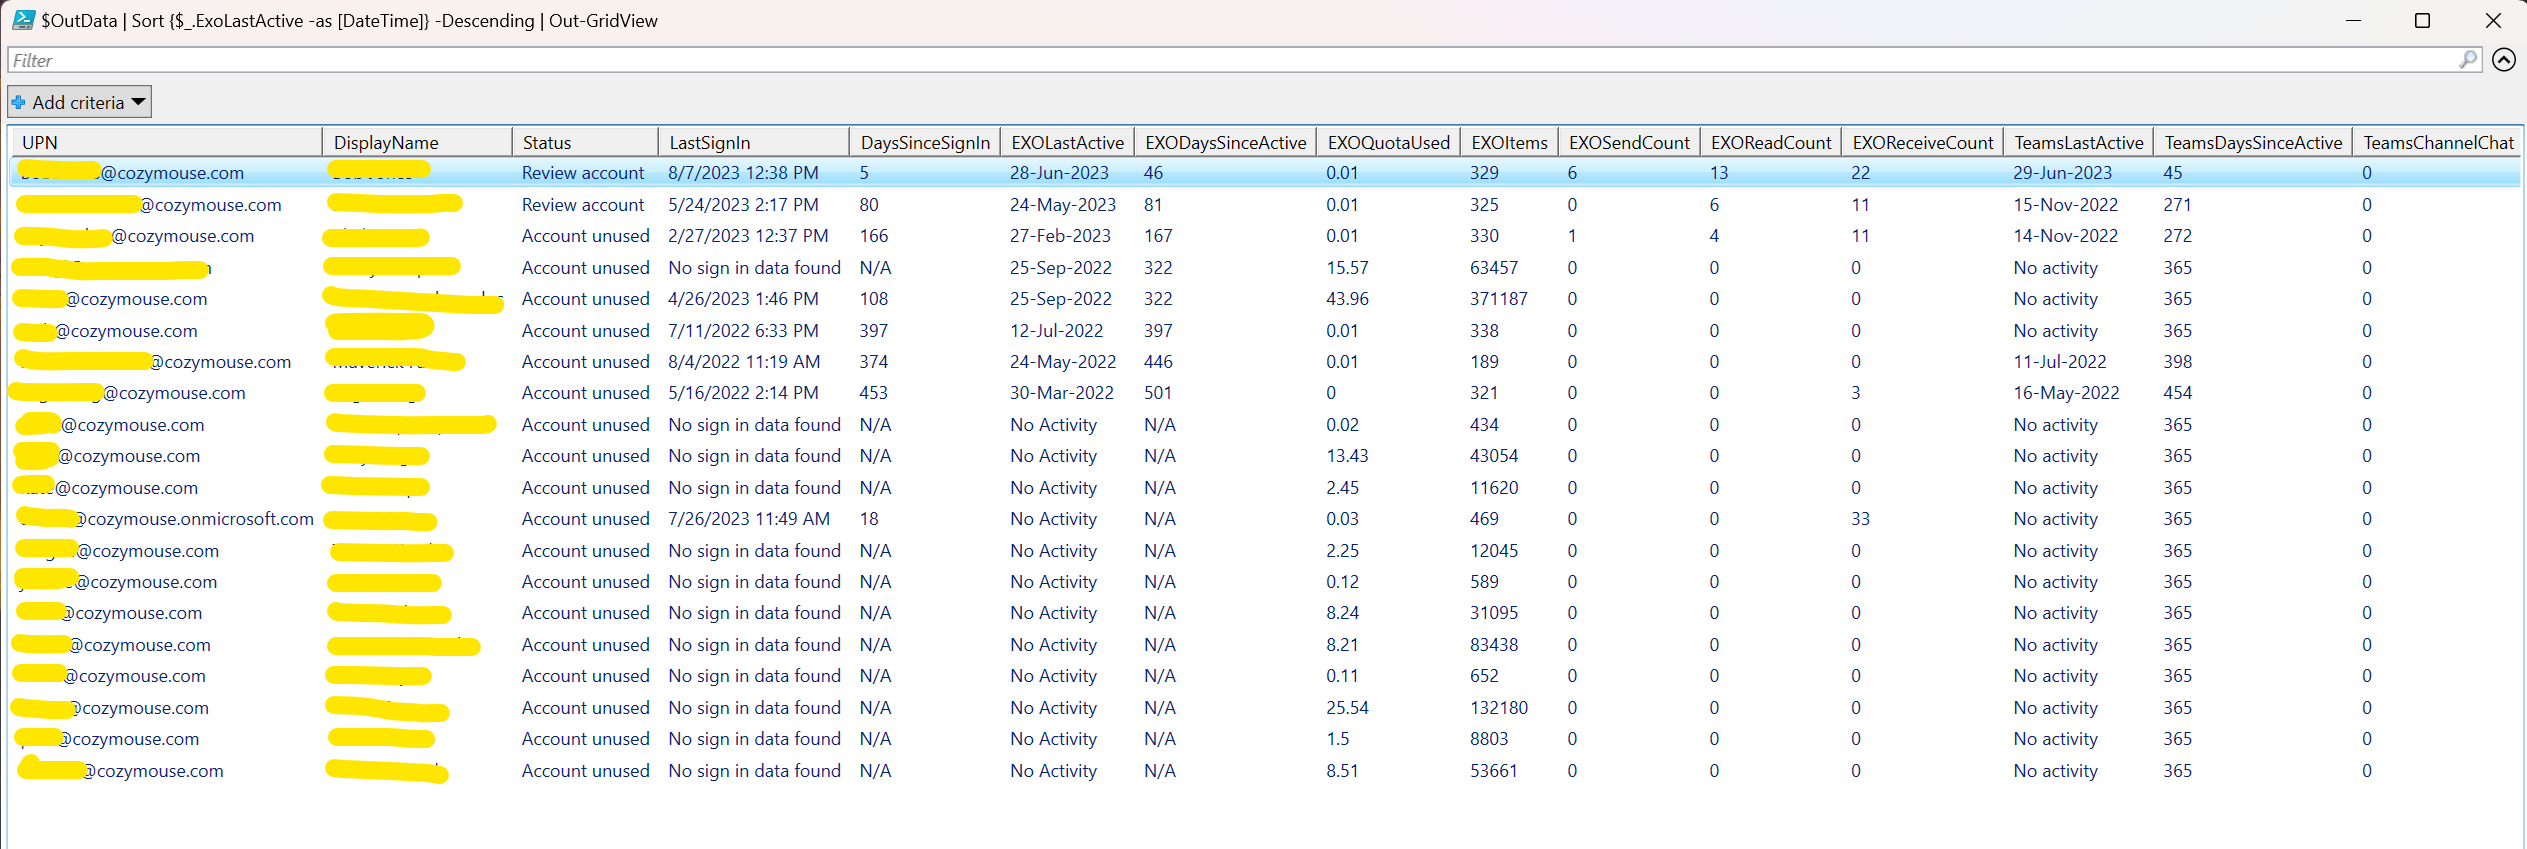
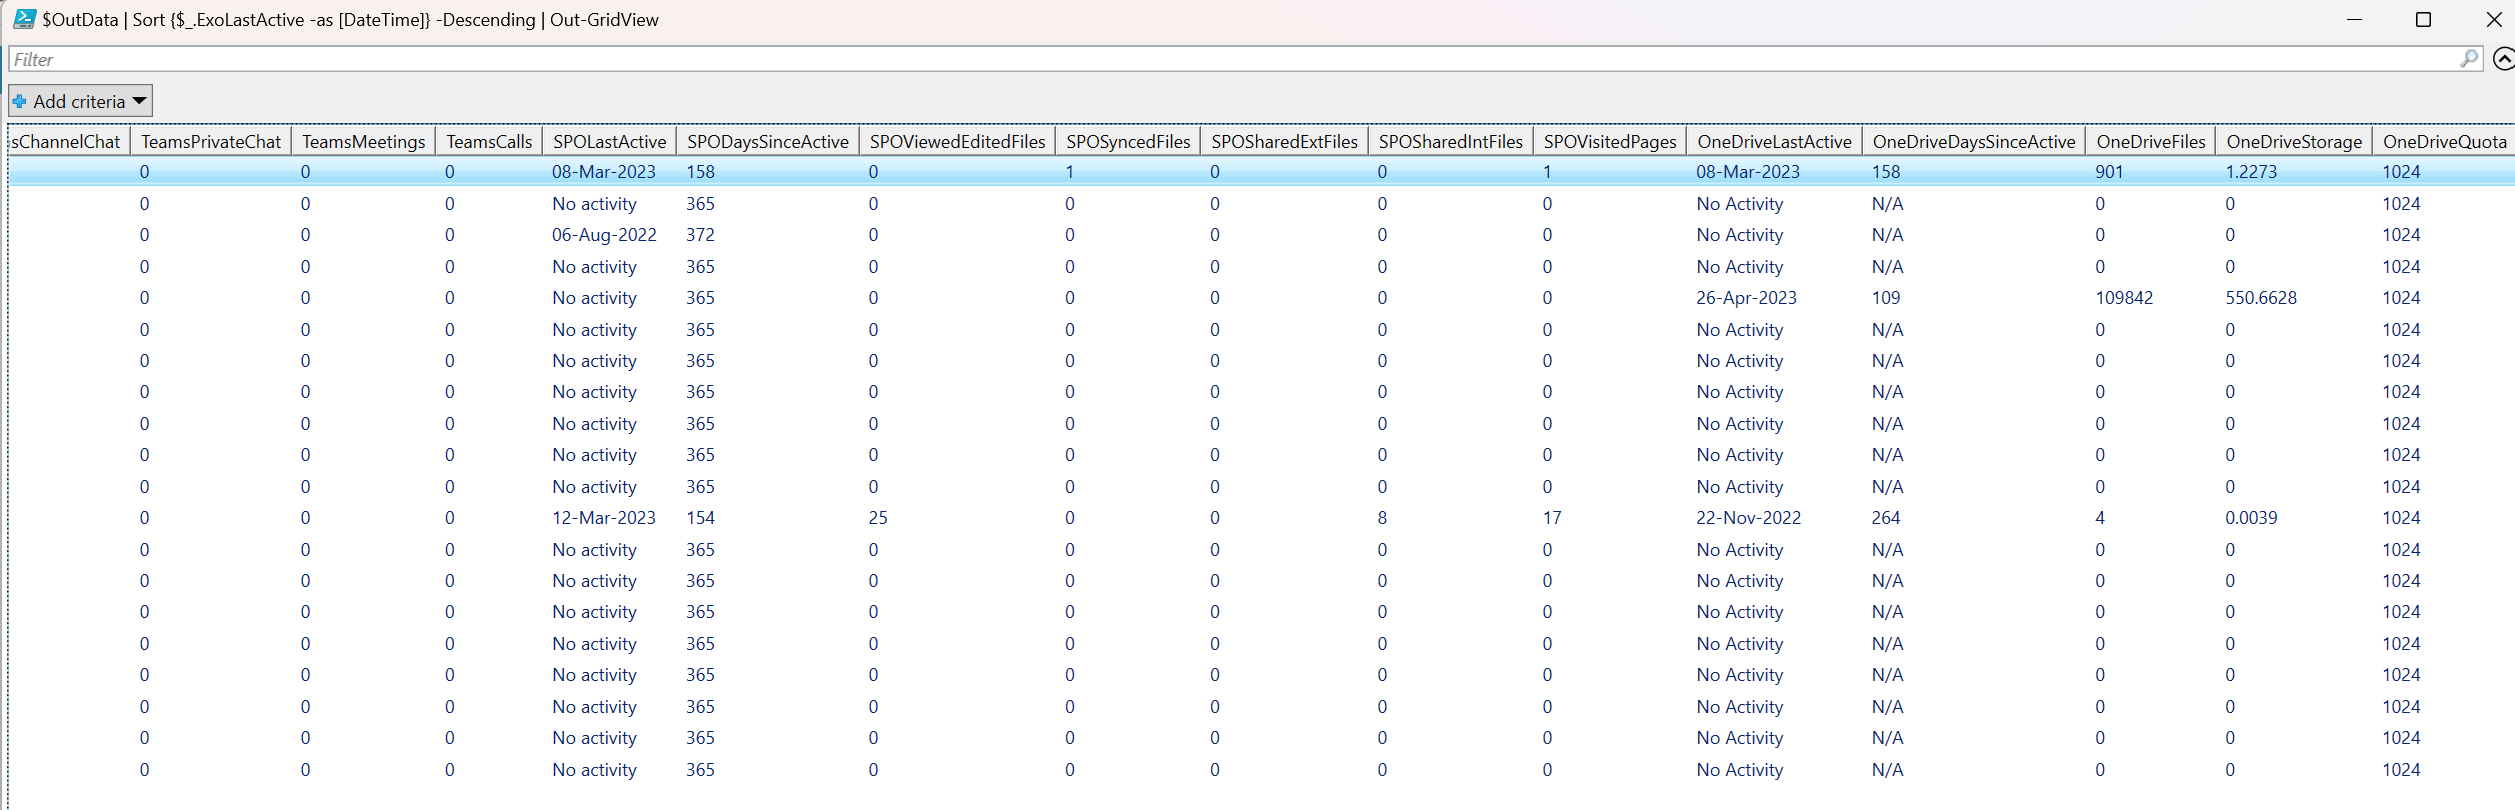
The report shows a ton of data around the Exchange, Teams, SharePoint, OneDrive and Yammer workloads. It shows what each individual user account is doing and shows the activity statistics in a tidy spreadsheet. Now obviously it doesn’t show the actual things they do, comments they make in Teams or Emails they send, because that does overstep the privacy bounds, but it does show that they are actively using resources.
Why do we want to see this. I can think of two examples straight off the bat here.
Firstly, you might have a need to consolidate licenses and you wonder if a particular account is active and if they are sending/receiving email, participating in Teams, or accessing SharePoint Online. With this report you can verify whether people have even logged in to M365 in the last six months, a year perhaps, or even ever.
Secondly, you may have rolled out Teams to a company and want to show Managers that people are indeed using it effectively. Maybe you activated OneDrive recently and want to see who is taking advantage of syncing their files.
Maybe you are wanting to decommission Yammer, but want to see who is still using it? Well there you go, good reason number three to run this report.
For anybody who wants to just jump straight in, here is the link for the script.
https://store.thecloudgeezer.com
Here are a few screenshots of the Output.

Once you have the script, you will need to give it some authorization to pull data from the M365 tenant. To do this you need to register an Application in Azure AD. Or should I say Entra now? Either way, it’s the same place. Here are the steps you need to do this.
Go into the normal https://portal.azure.com and then into Azure Active Directory. In there you will find ‘App Registrations’. Click on that and you will see a screen similar to this.
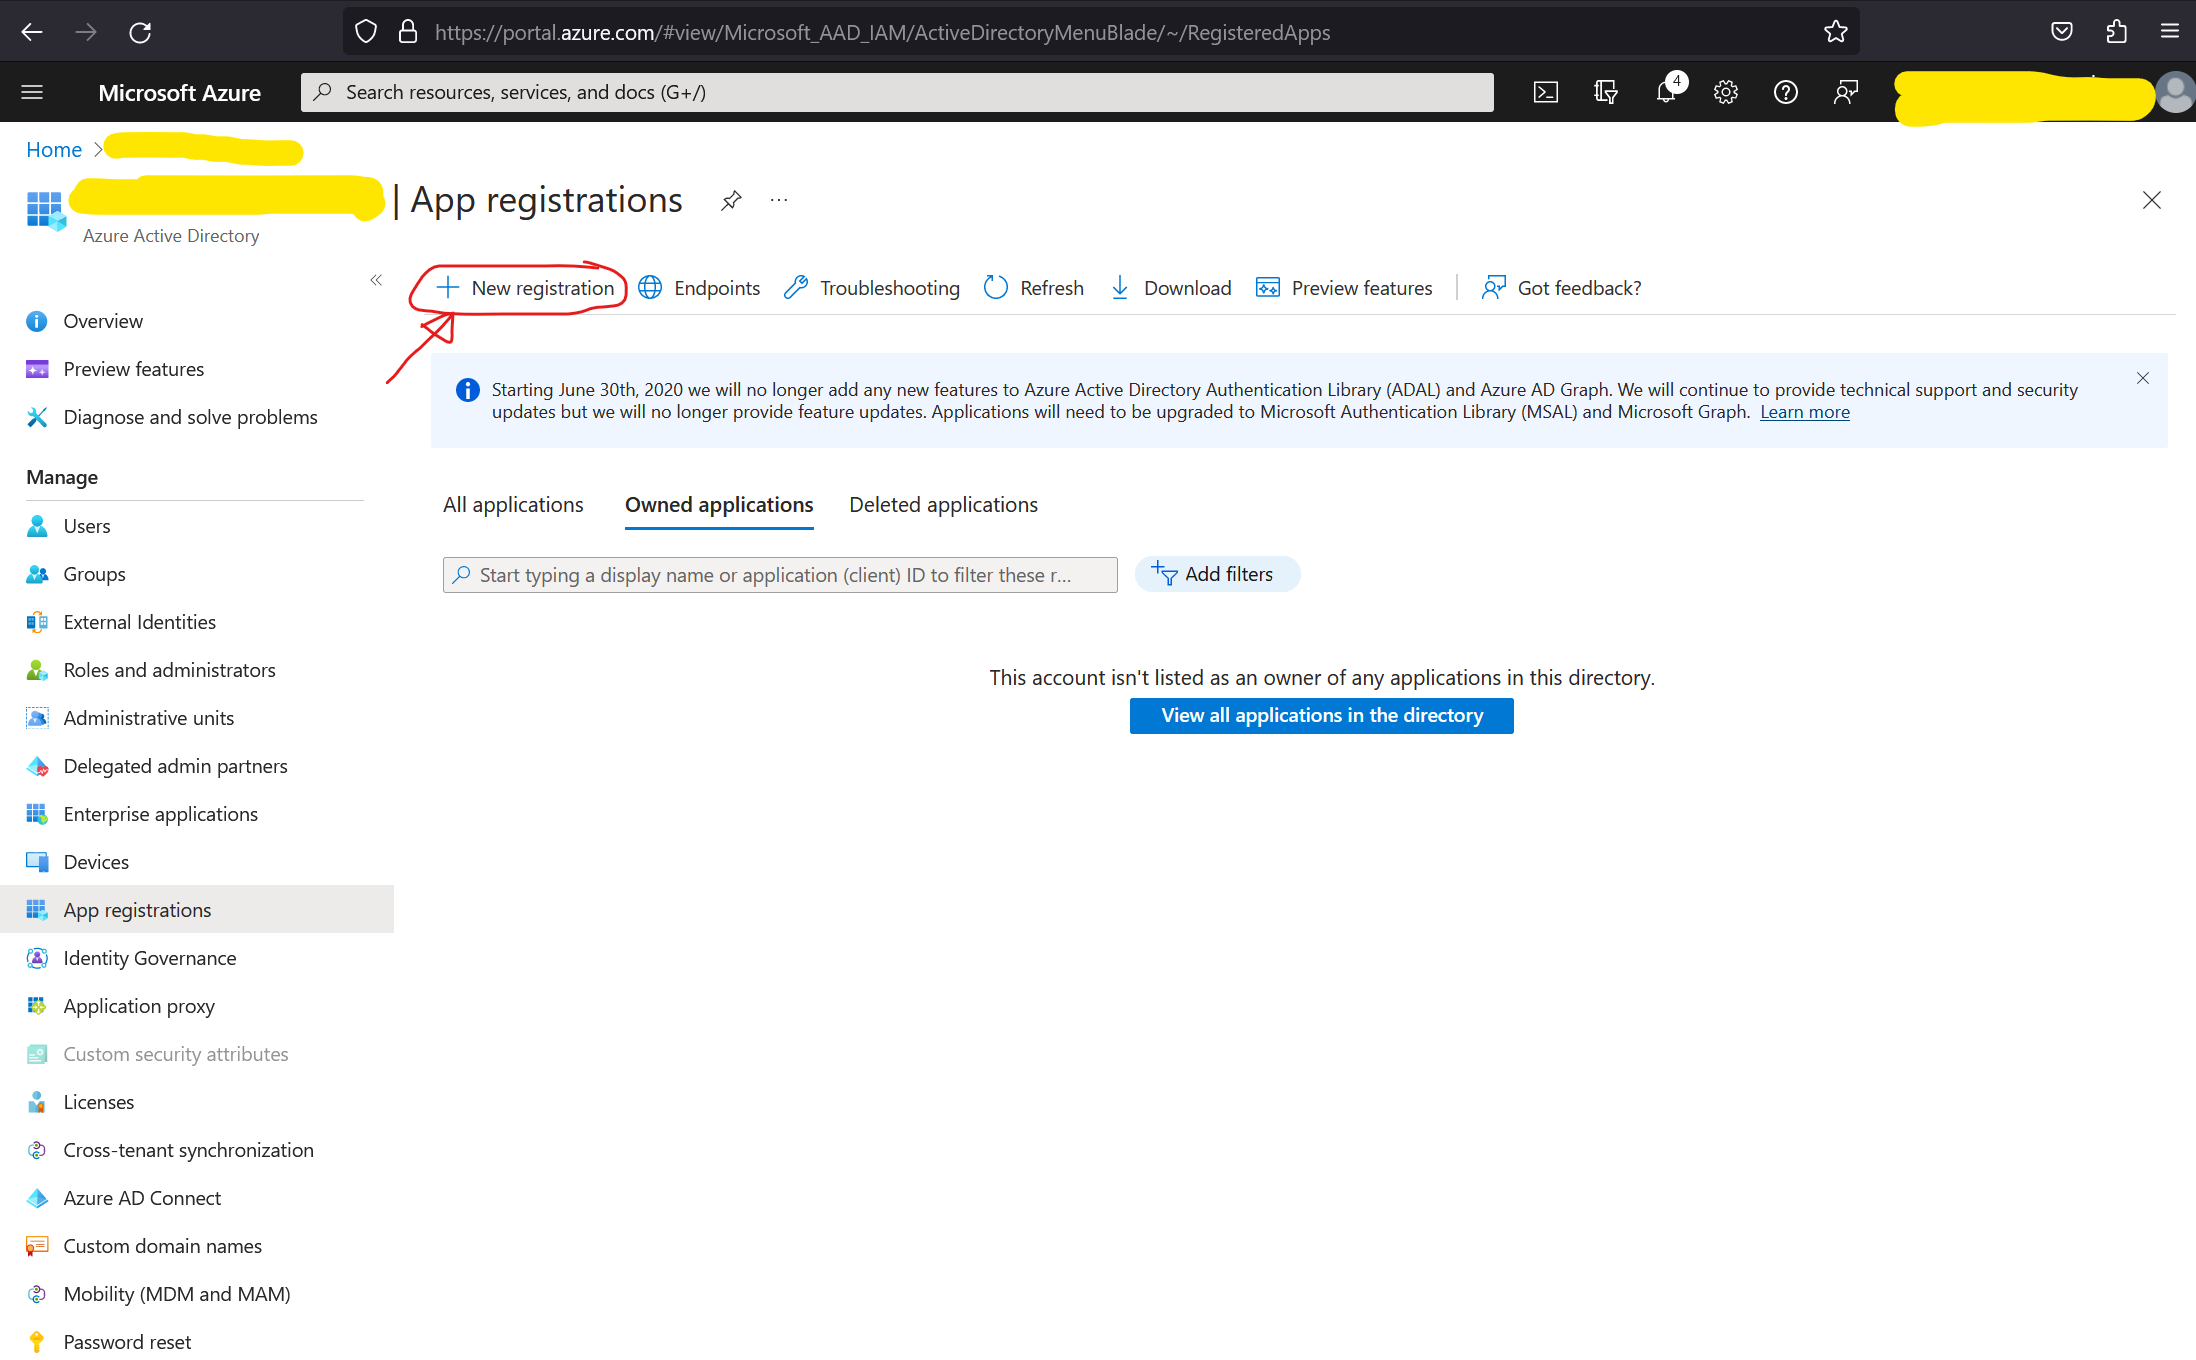
Click on the ‘New Registration’ item as shown above.
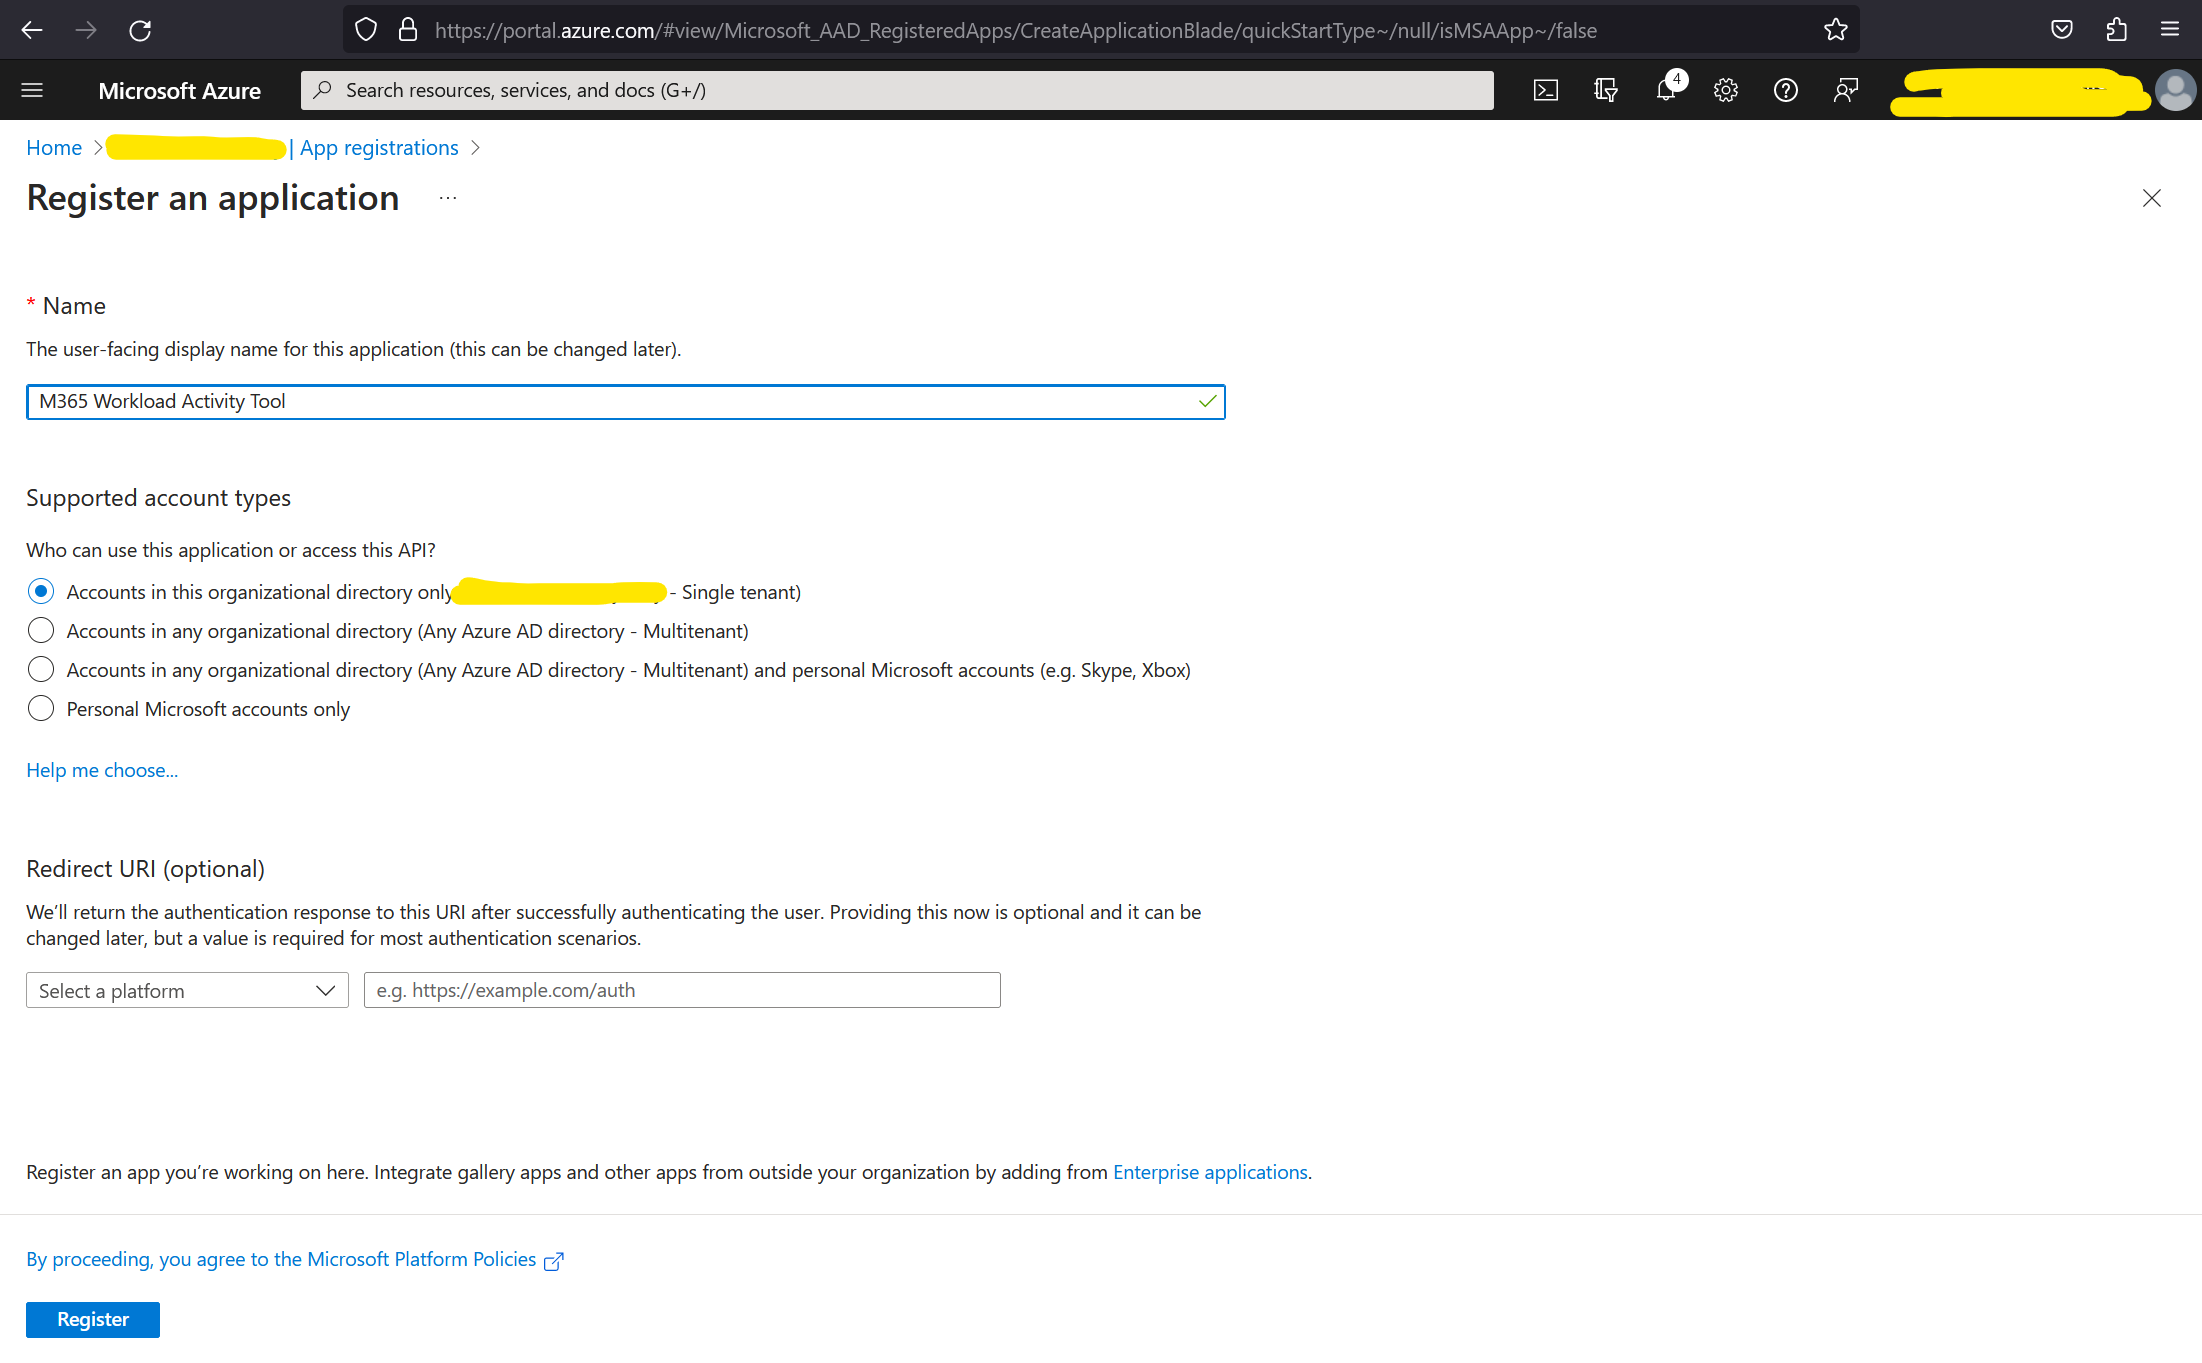
Give it a name, your choice, and click on ‘Register’
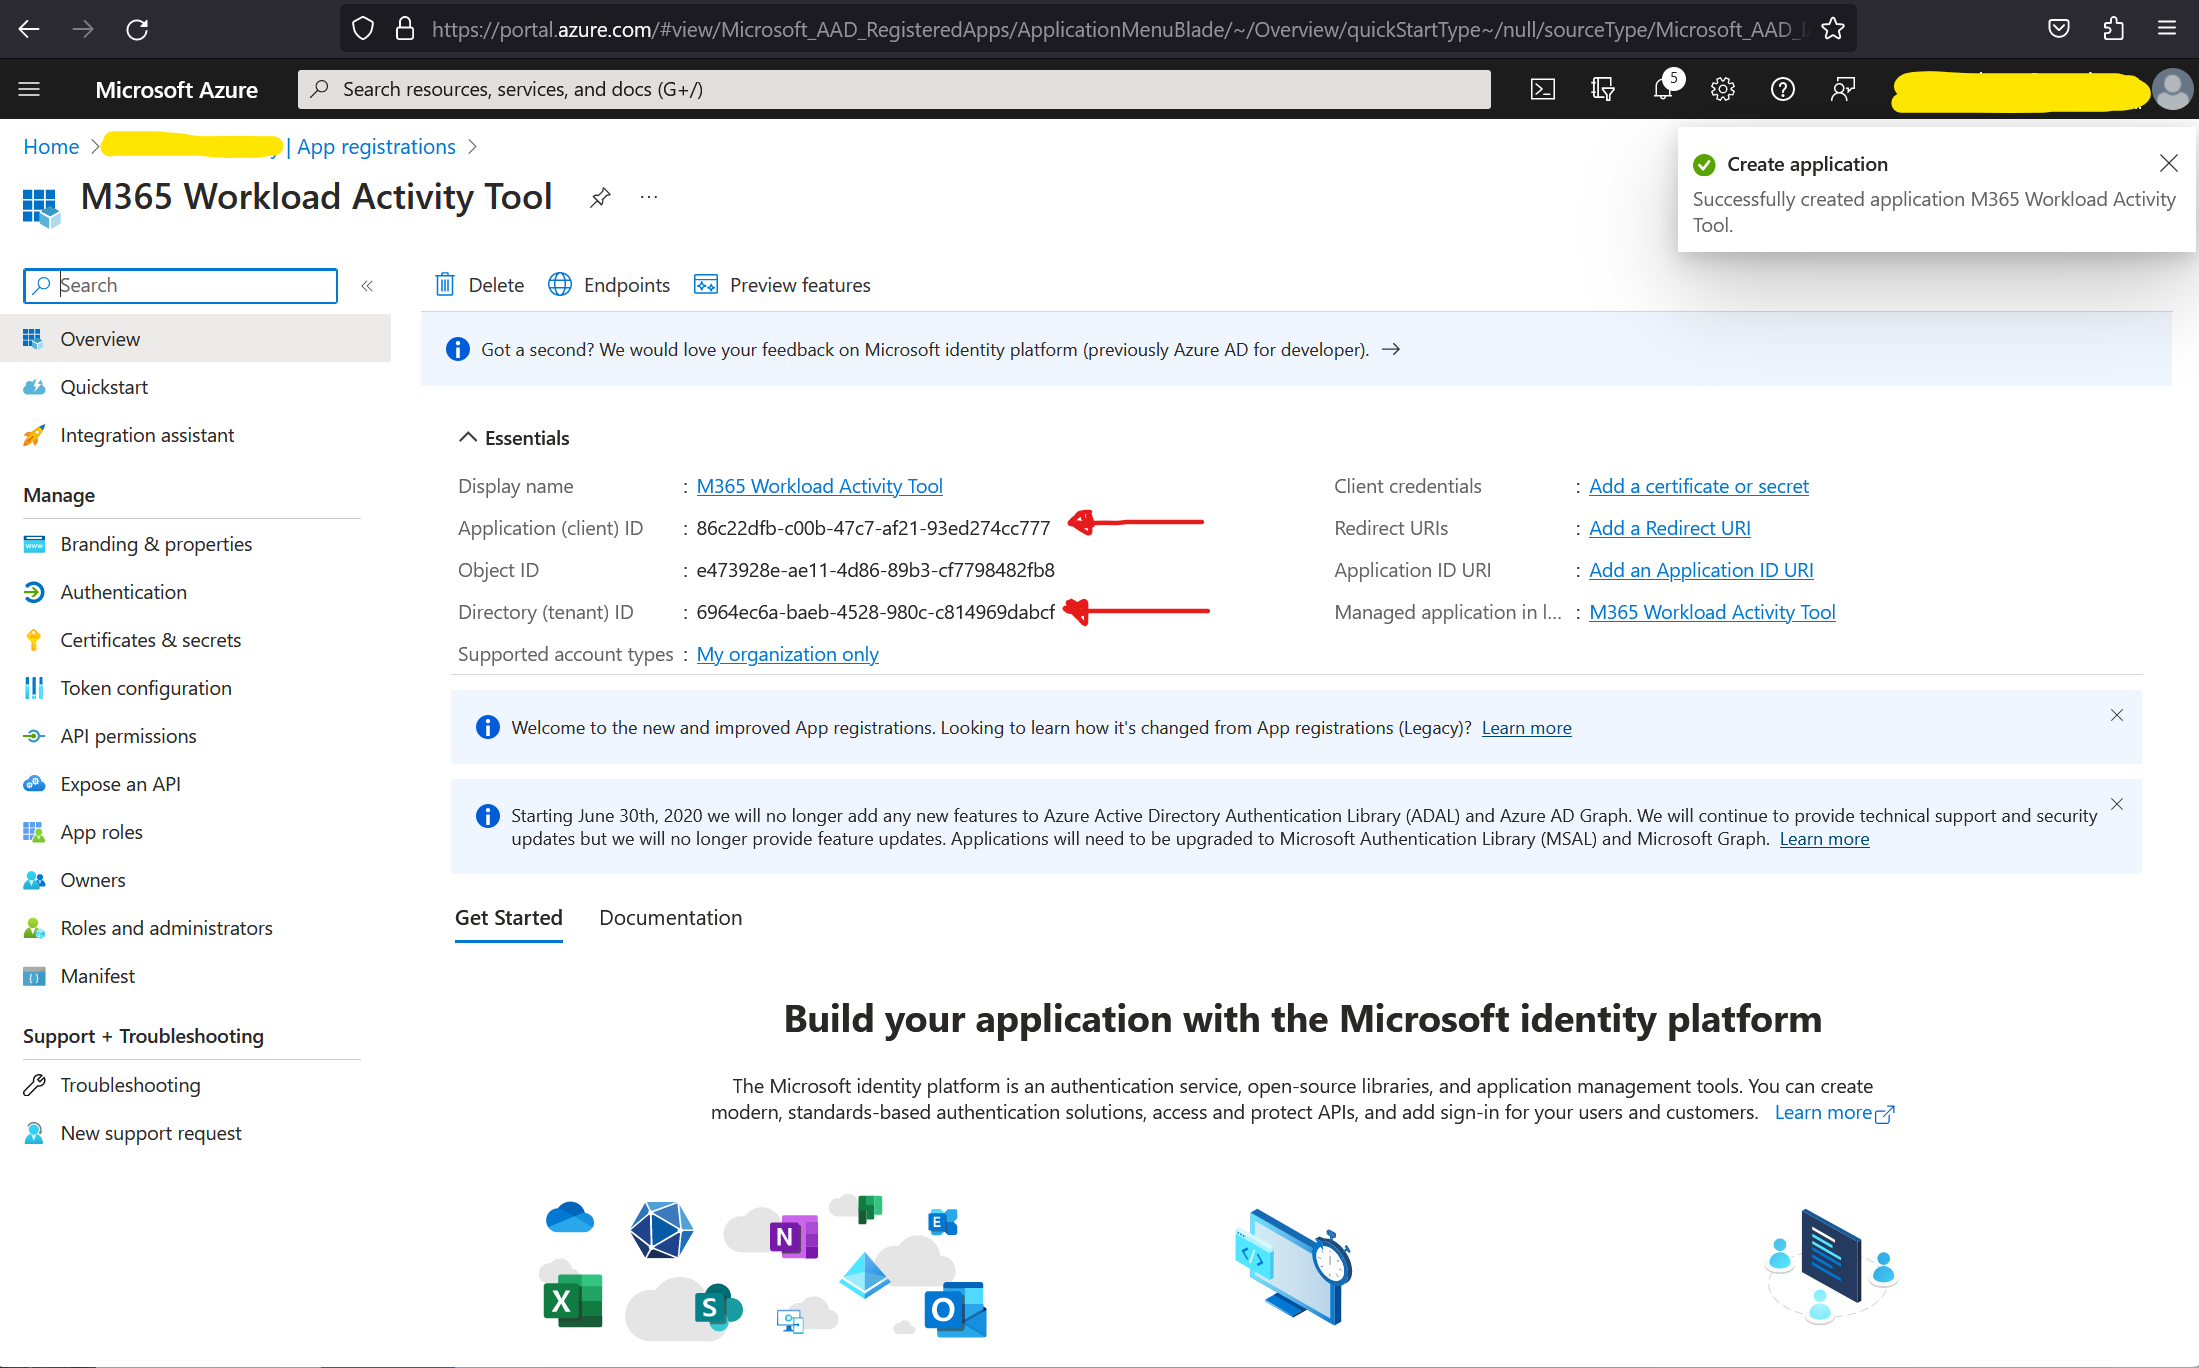
In the following screen you want to copy/paste these items into Notepad as you will need to copy them into the script.
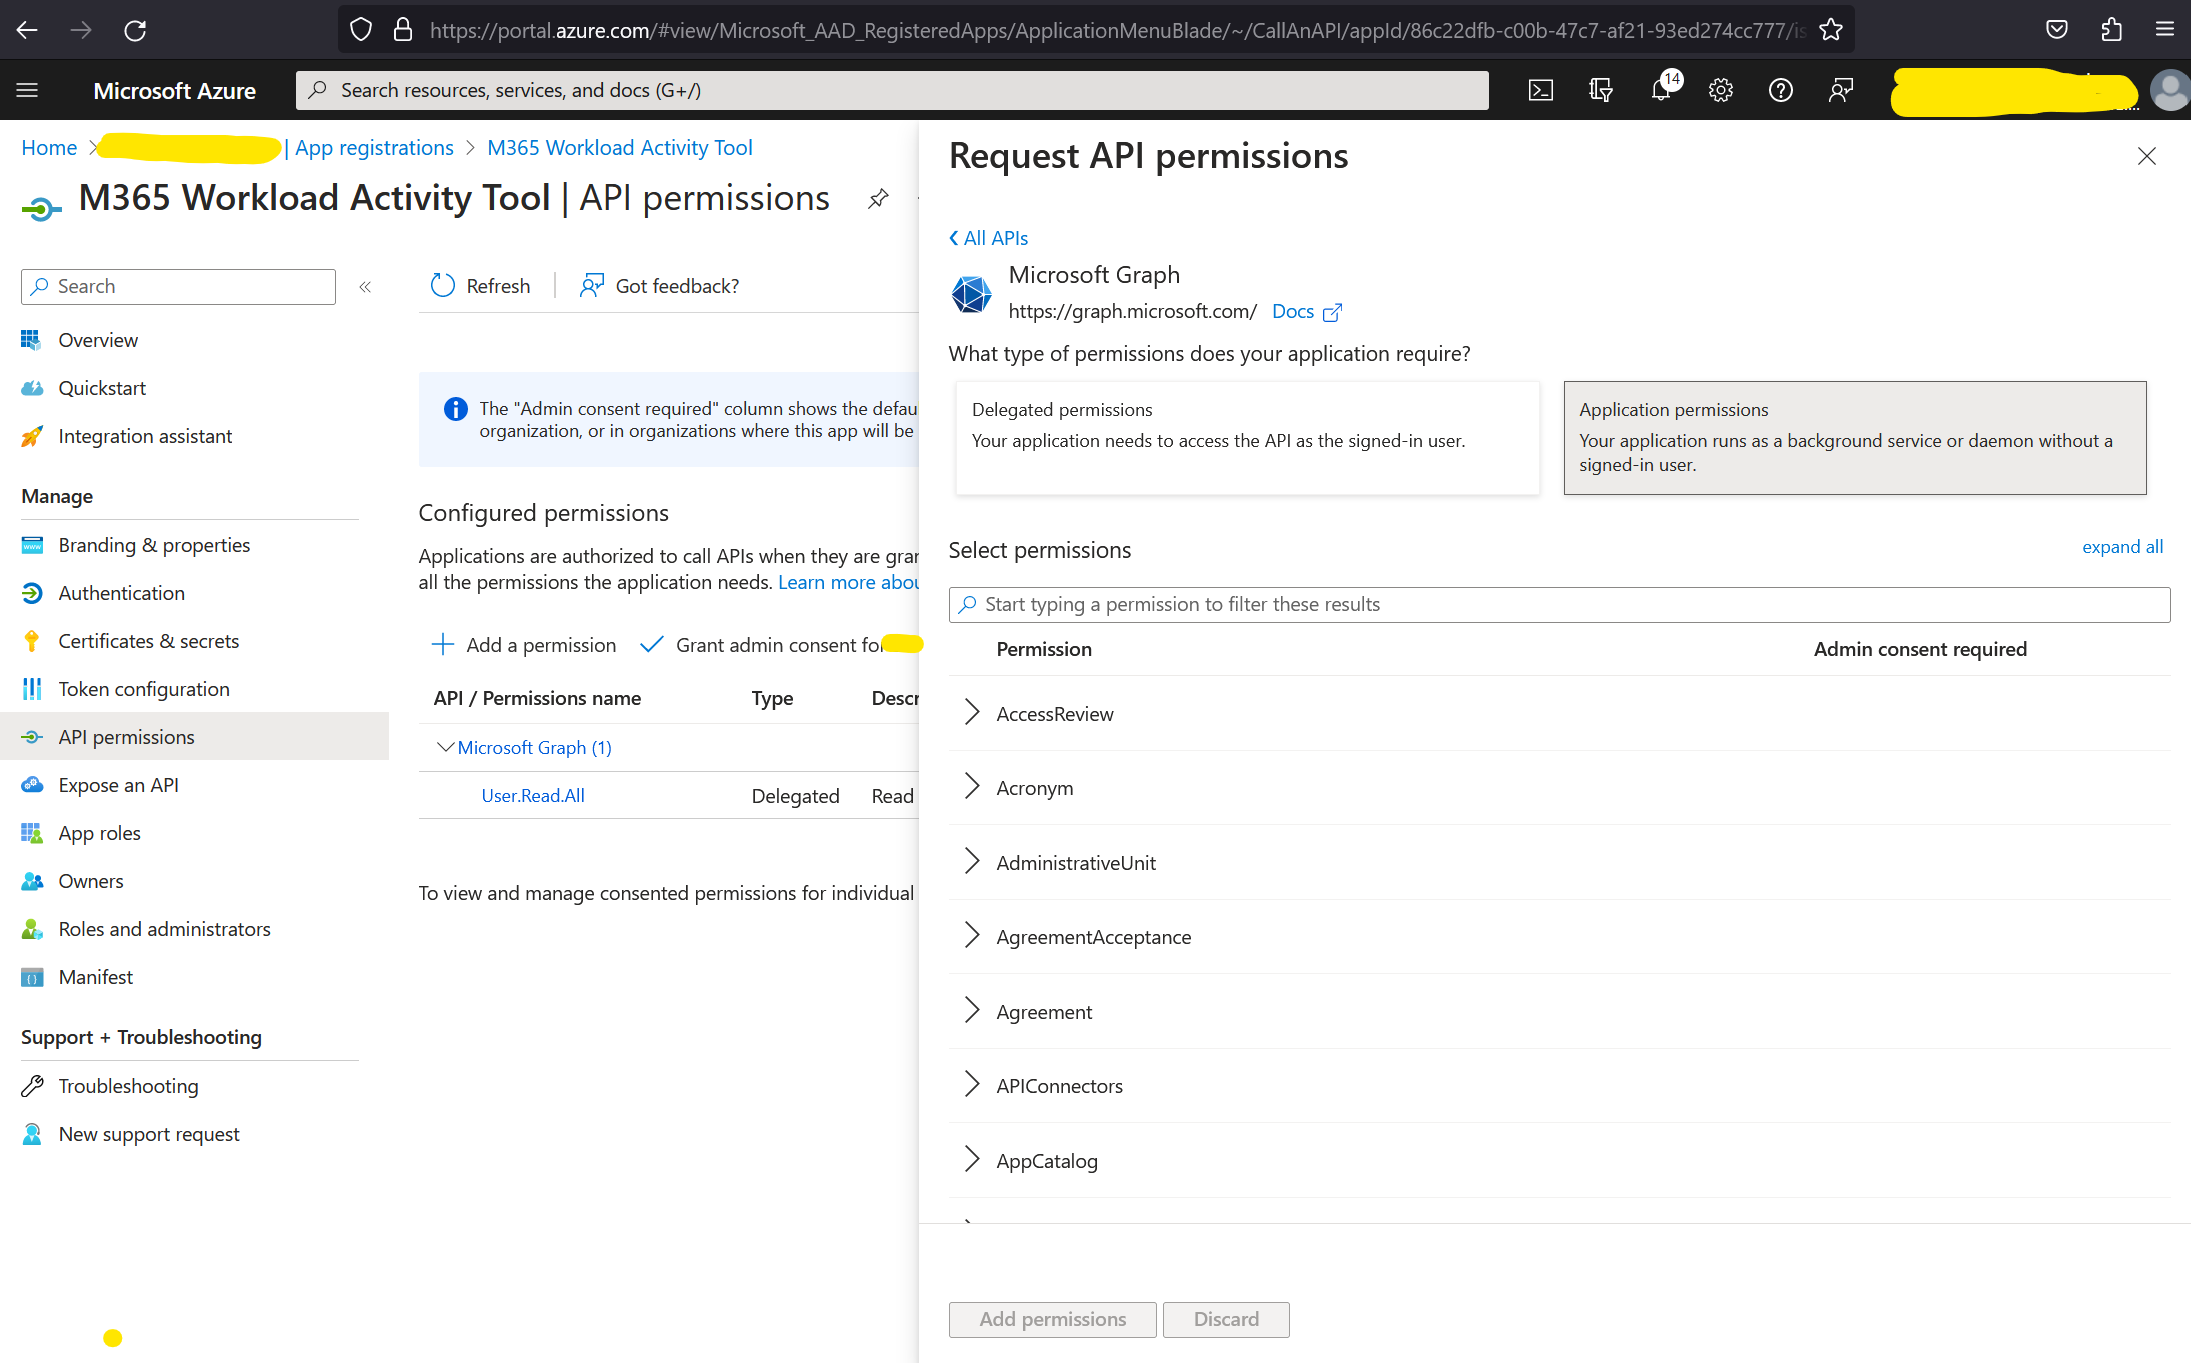
Now we need to give it some permissions in the Tenant and apply a ‘Client Secret’ to it, which is basically a password. We do that by clicking on ‘API Permissions’ in the left hand menu. Then click on ‘Add a Permission’. The type of permission to add is ‘Microsoft Graph’ which is the top item listed under Microsoft API’s. Once you select ‘Microsoft Graph’, select ‘Application Permissions’. The screen will present like this.
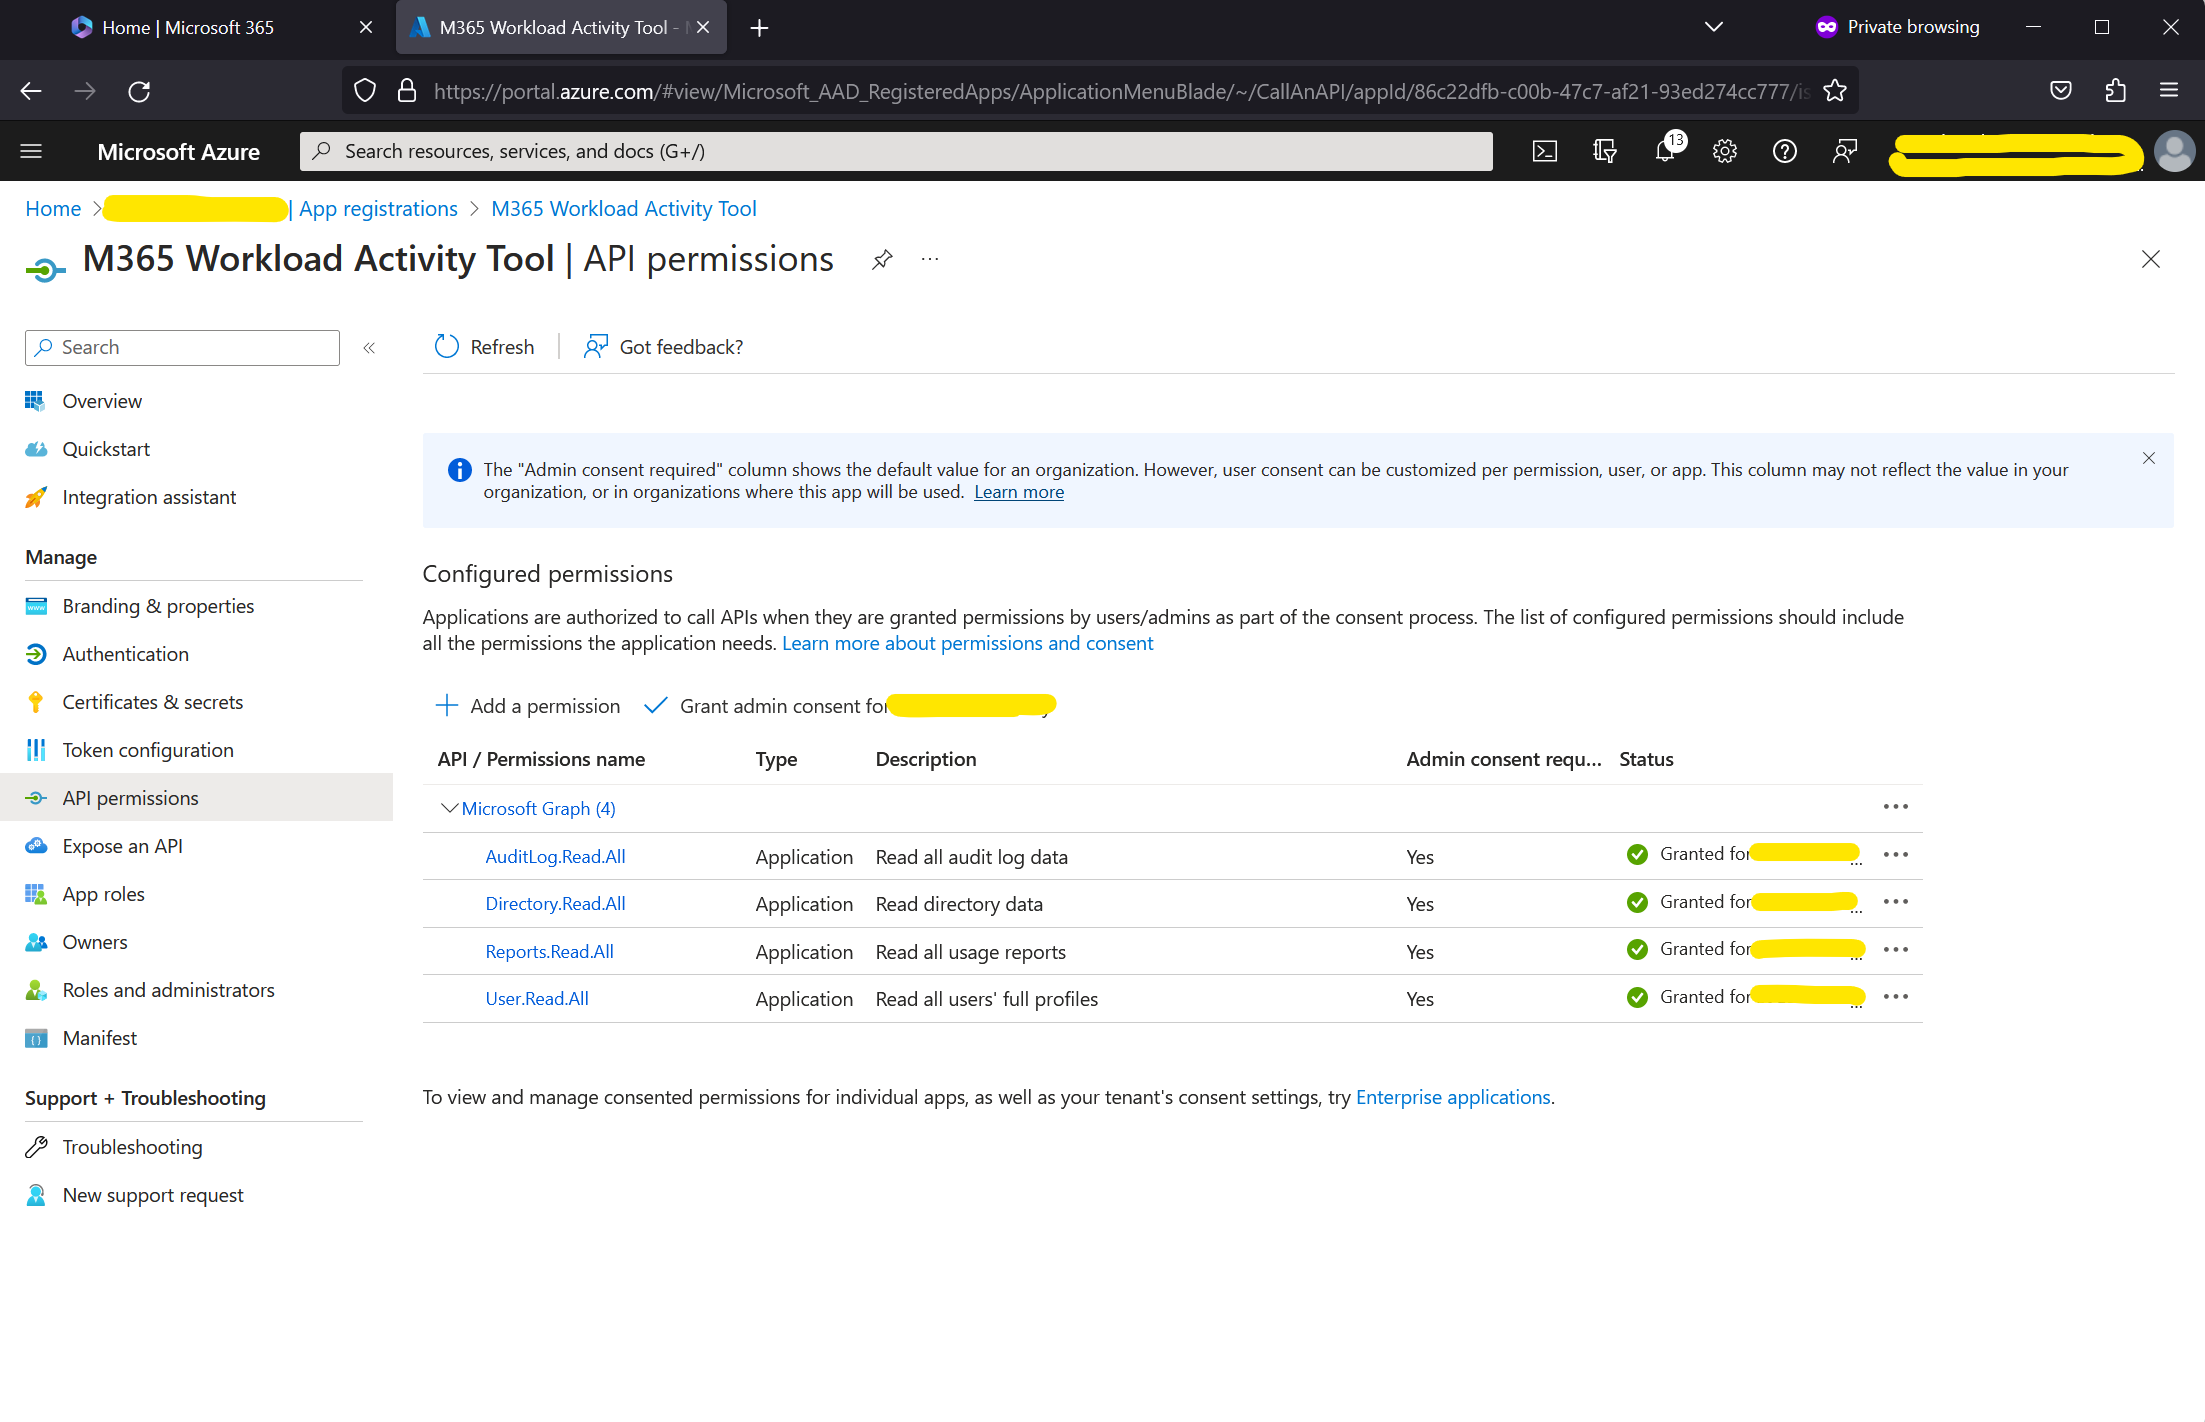
The permissions you need to add in are.
- AuditLog.Read.All
- Directory.Read.All
- Reports.Read.All
- User.Read.All
You can remove the ‘User.Read’ permission that will be selected by default.
After saving those, you will need to click on the ‘Grant admin consent’ button. Once done, the screen should look something like this.
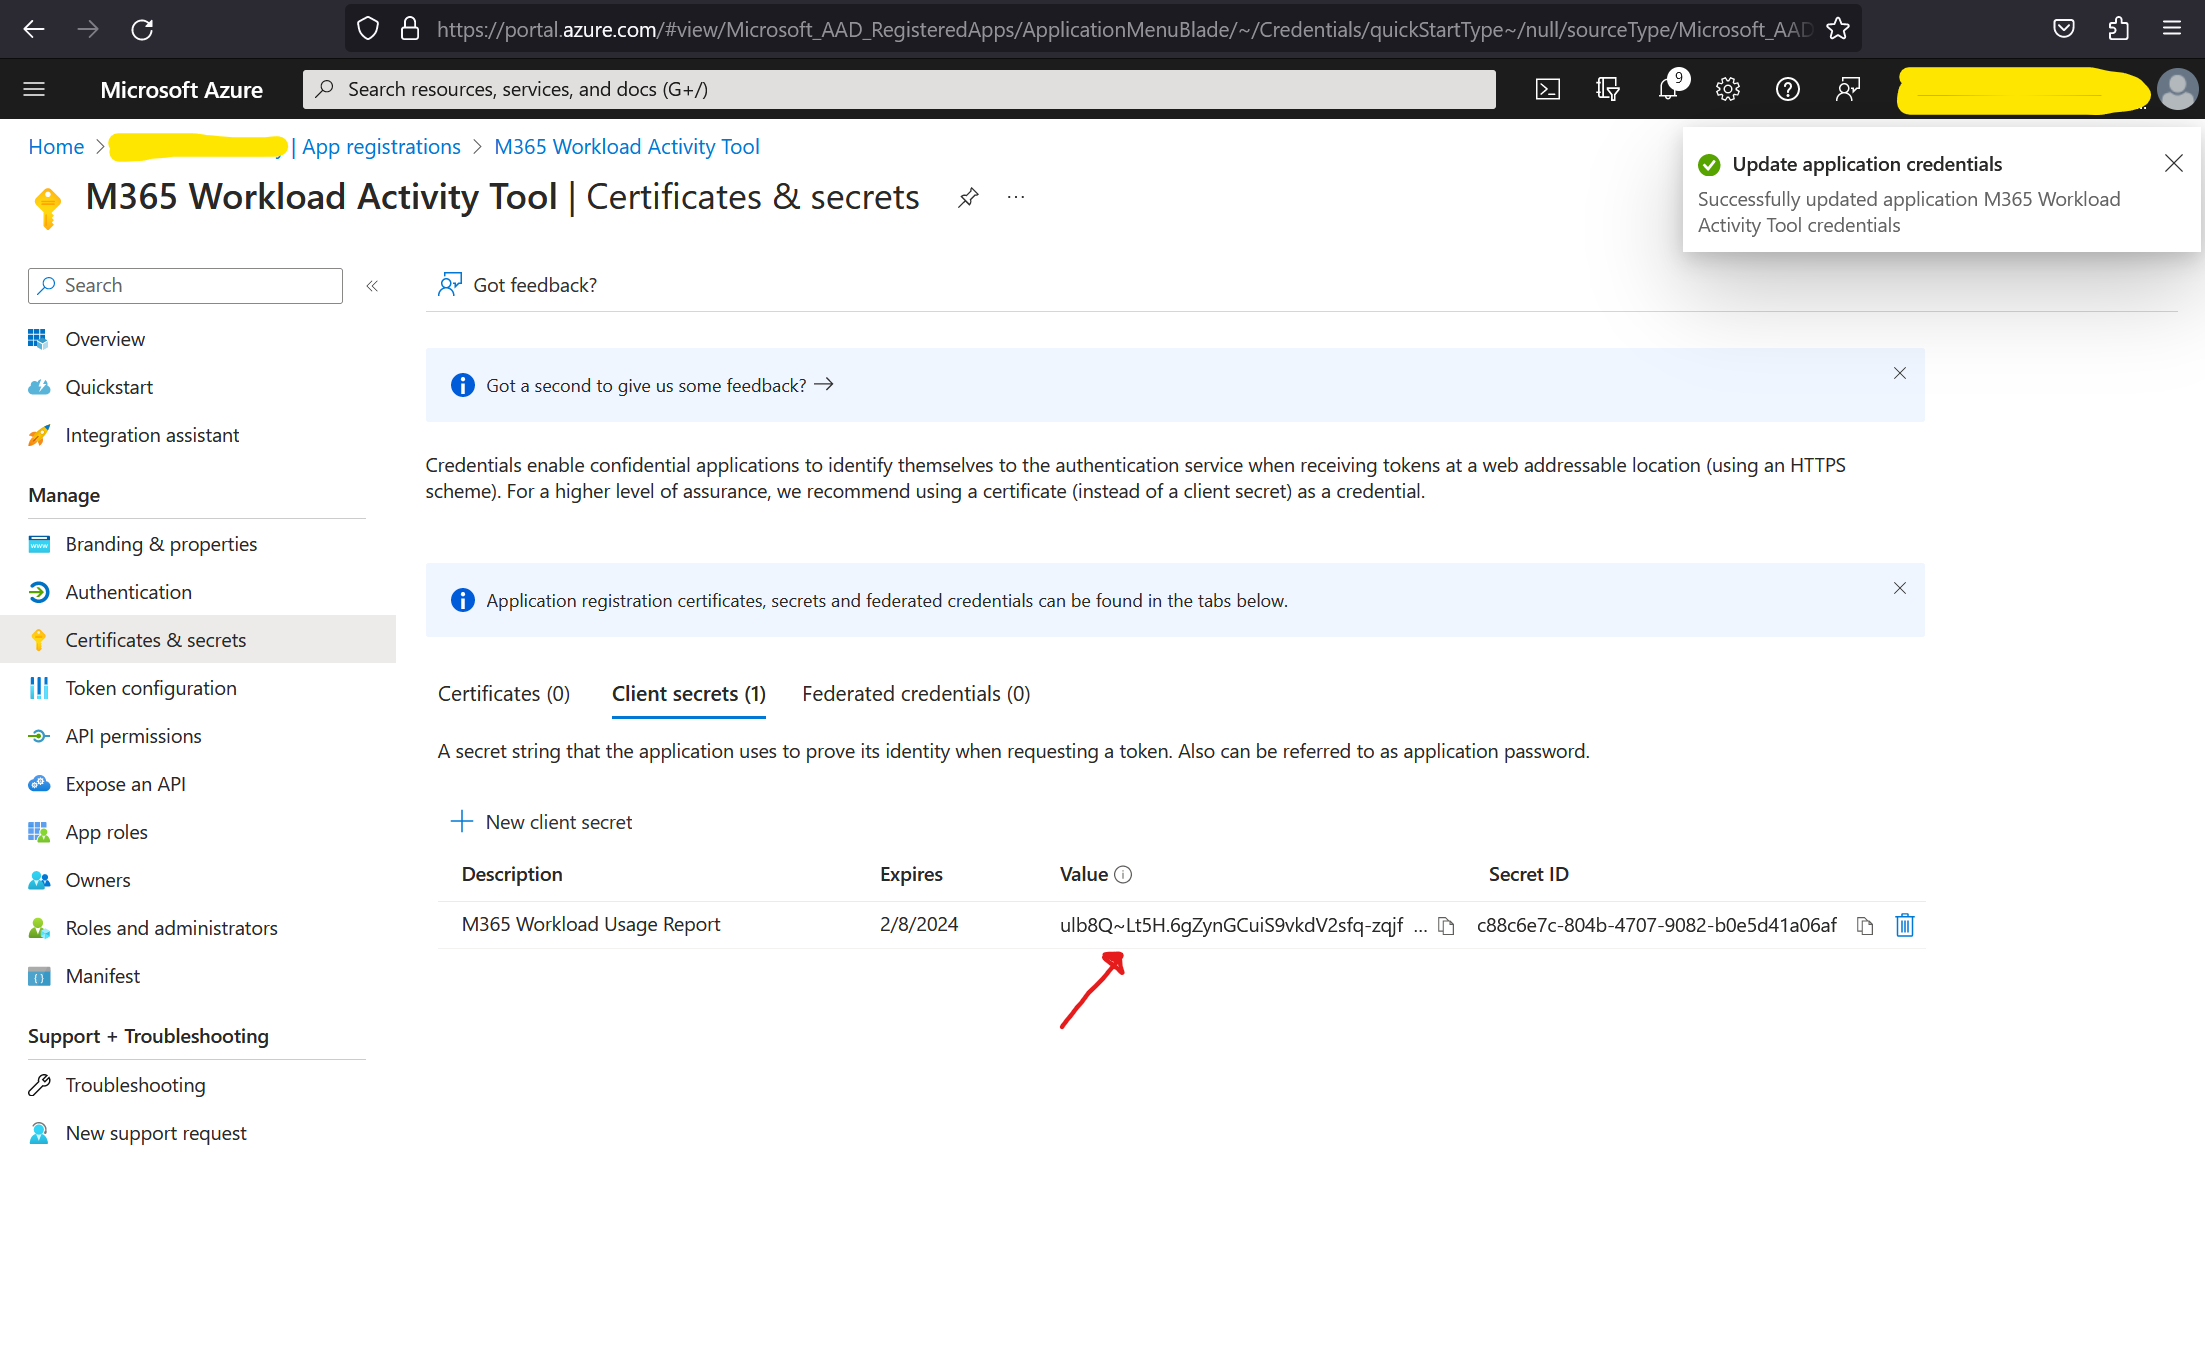
To add the Client Secret, go into ‘Certificates & Secrets’ on the left hand menu.
Click on ‘New Client Secret’, give it a name and click ‘Add’
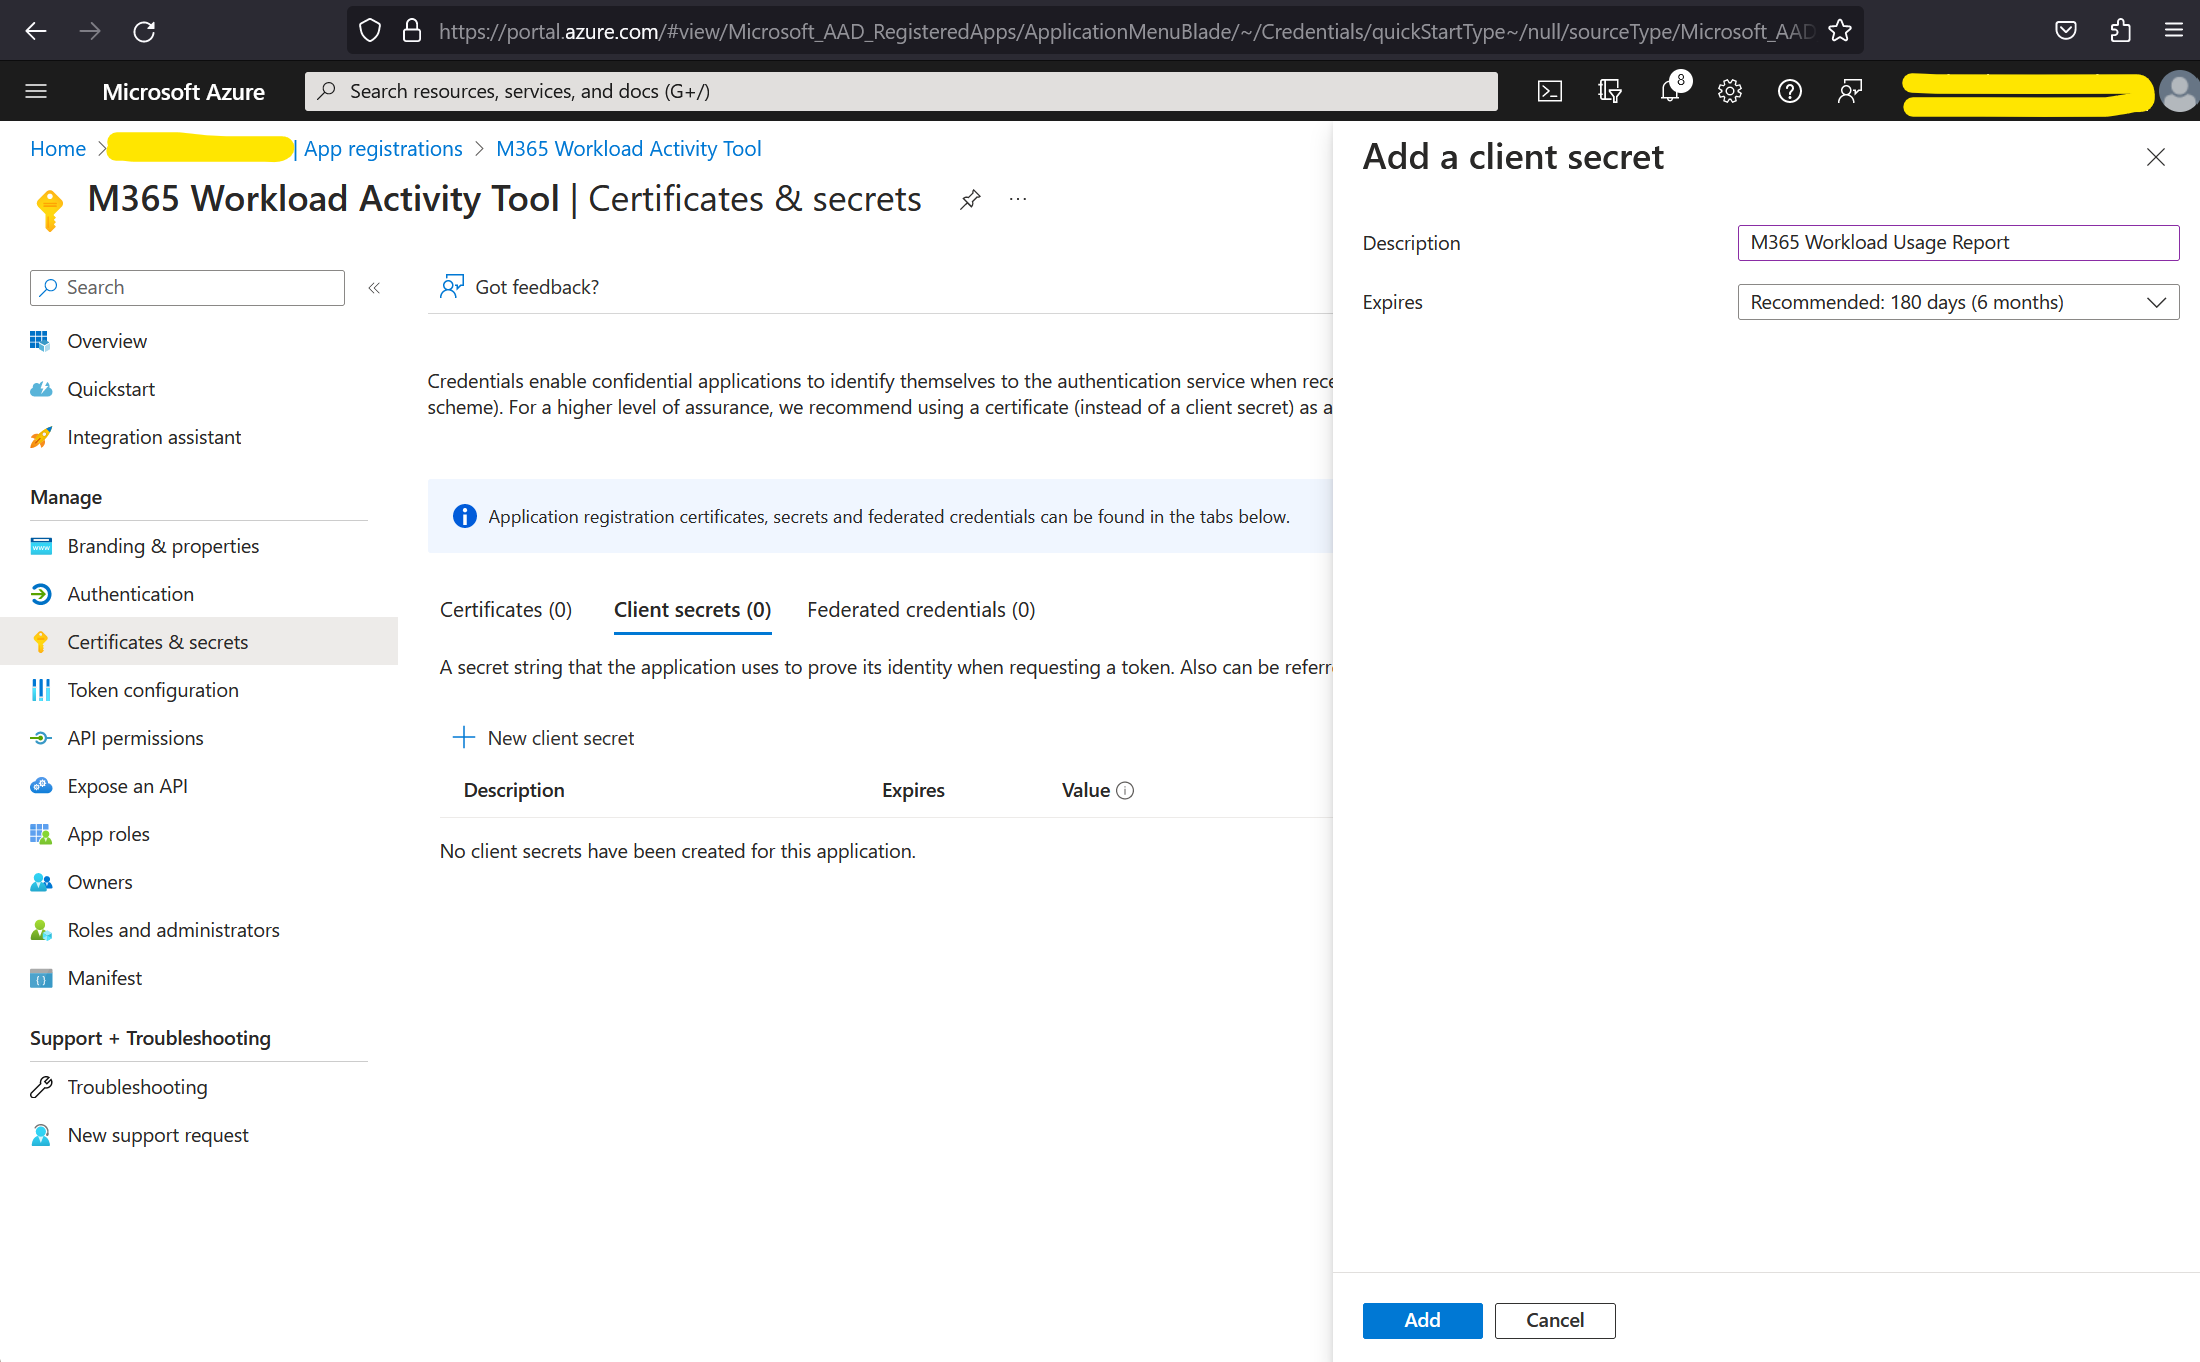
On the following screen copy/paste the client secret value into Notepad as well. Now remember that this secret is only displayed once. You can’t go back to it later so grab it now.
In the script itself, this is where you now enter those three pieces of information you have collected.
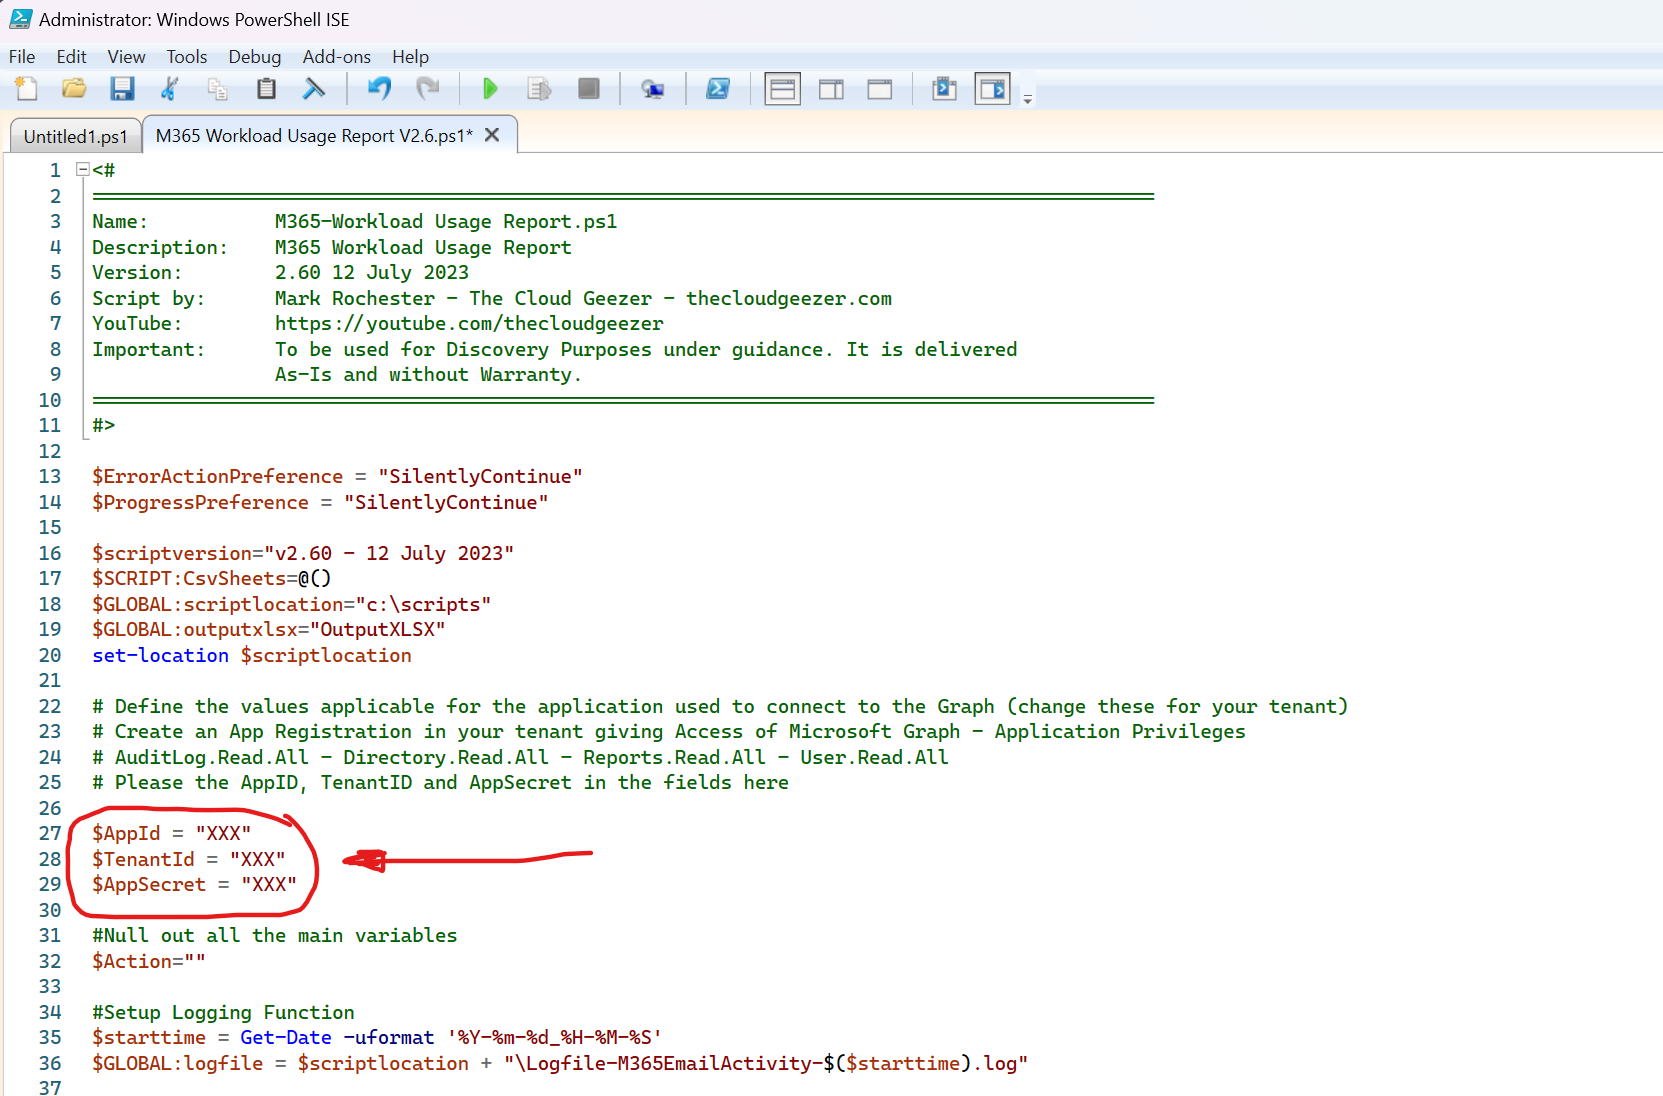
Don’t you love my MsPaint skills. Breathtaking I know!
So now you are ready to run the script. When it starts it will check the Ms Graph modules it needs. It only needs to do a Graph connection with the PowerShell SDK because normally the actual names and UPN’s of accounts are hidden behind their GUID’s. There is an additional part of the script that makes them visible but it requires that connection to do it. Check out the script lines 309-314 if you want to see what is happening here. It also uses this connection to get the last sign in data for the report.
Go ahead and run it now. The location can be changed where it stores the files. I use c:\scripts normally which is why I defaulted to that. Up to you what you do with the location there.
It may ask you to install the Graph Modules if you haven’t got them on your machine yet.
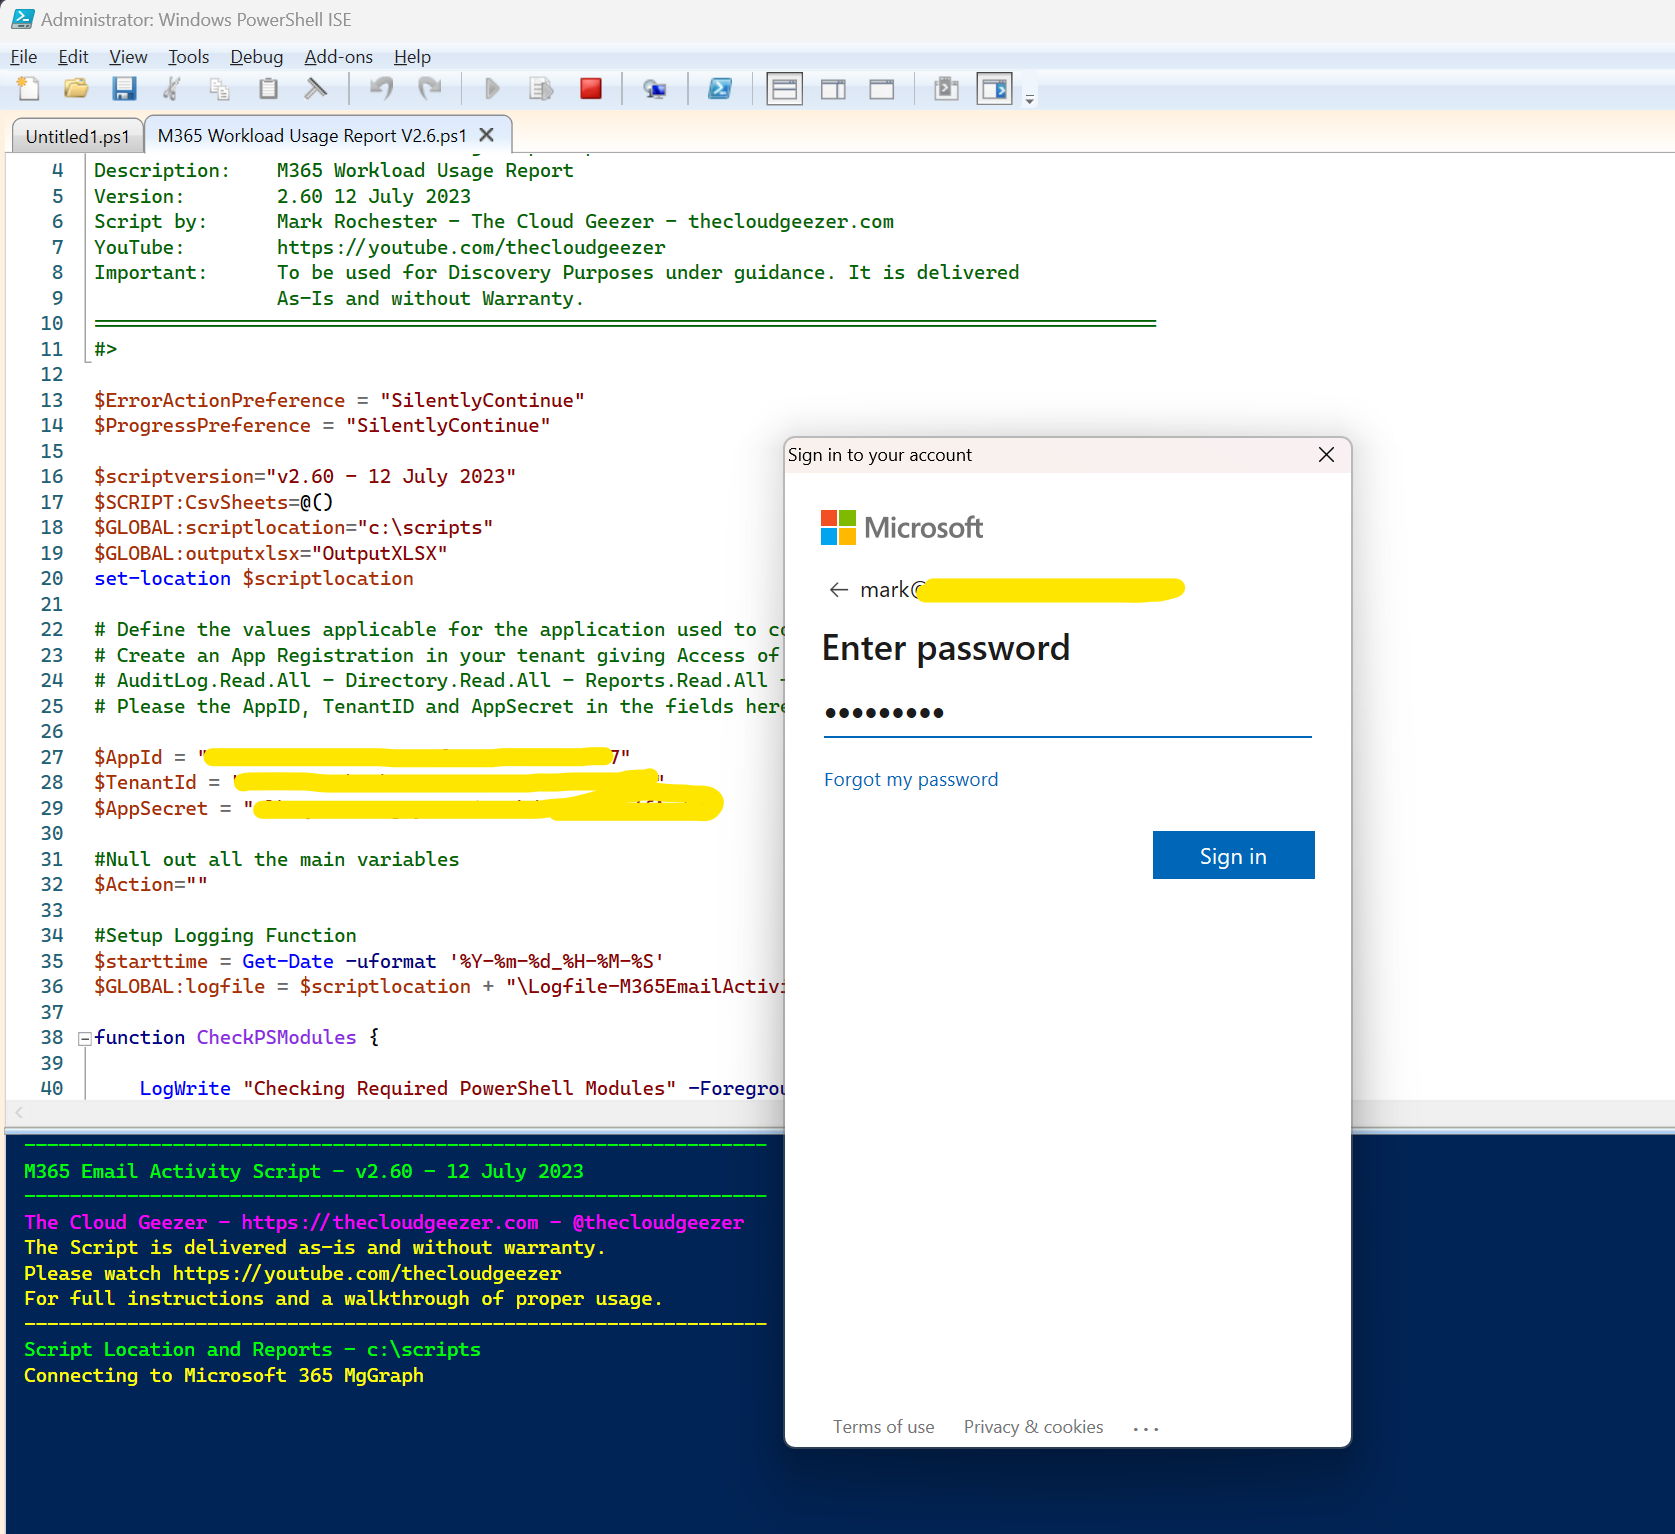
This is the Graph connection that is initiated. Choose an account that has rights to see the User Directory and login.
Once completed, you will see the ‘Grid View’ output of the data, but also the details on the file name of the Excel Sheet and CSV file that make up the report.

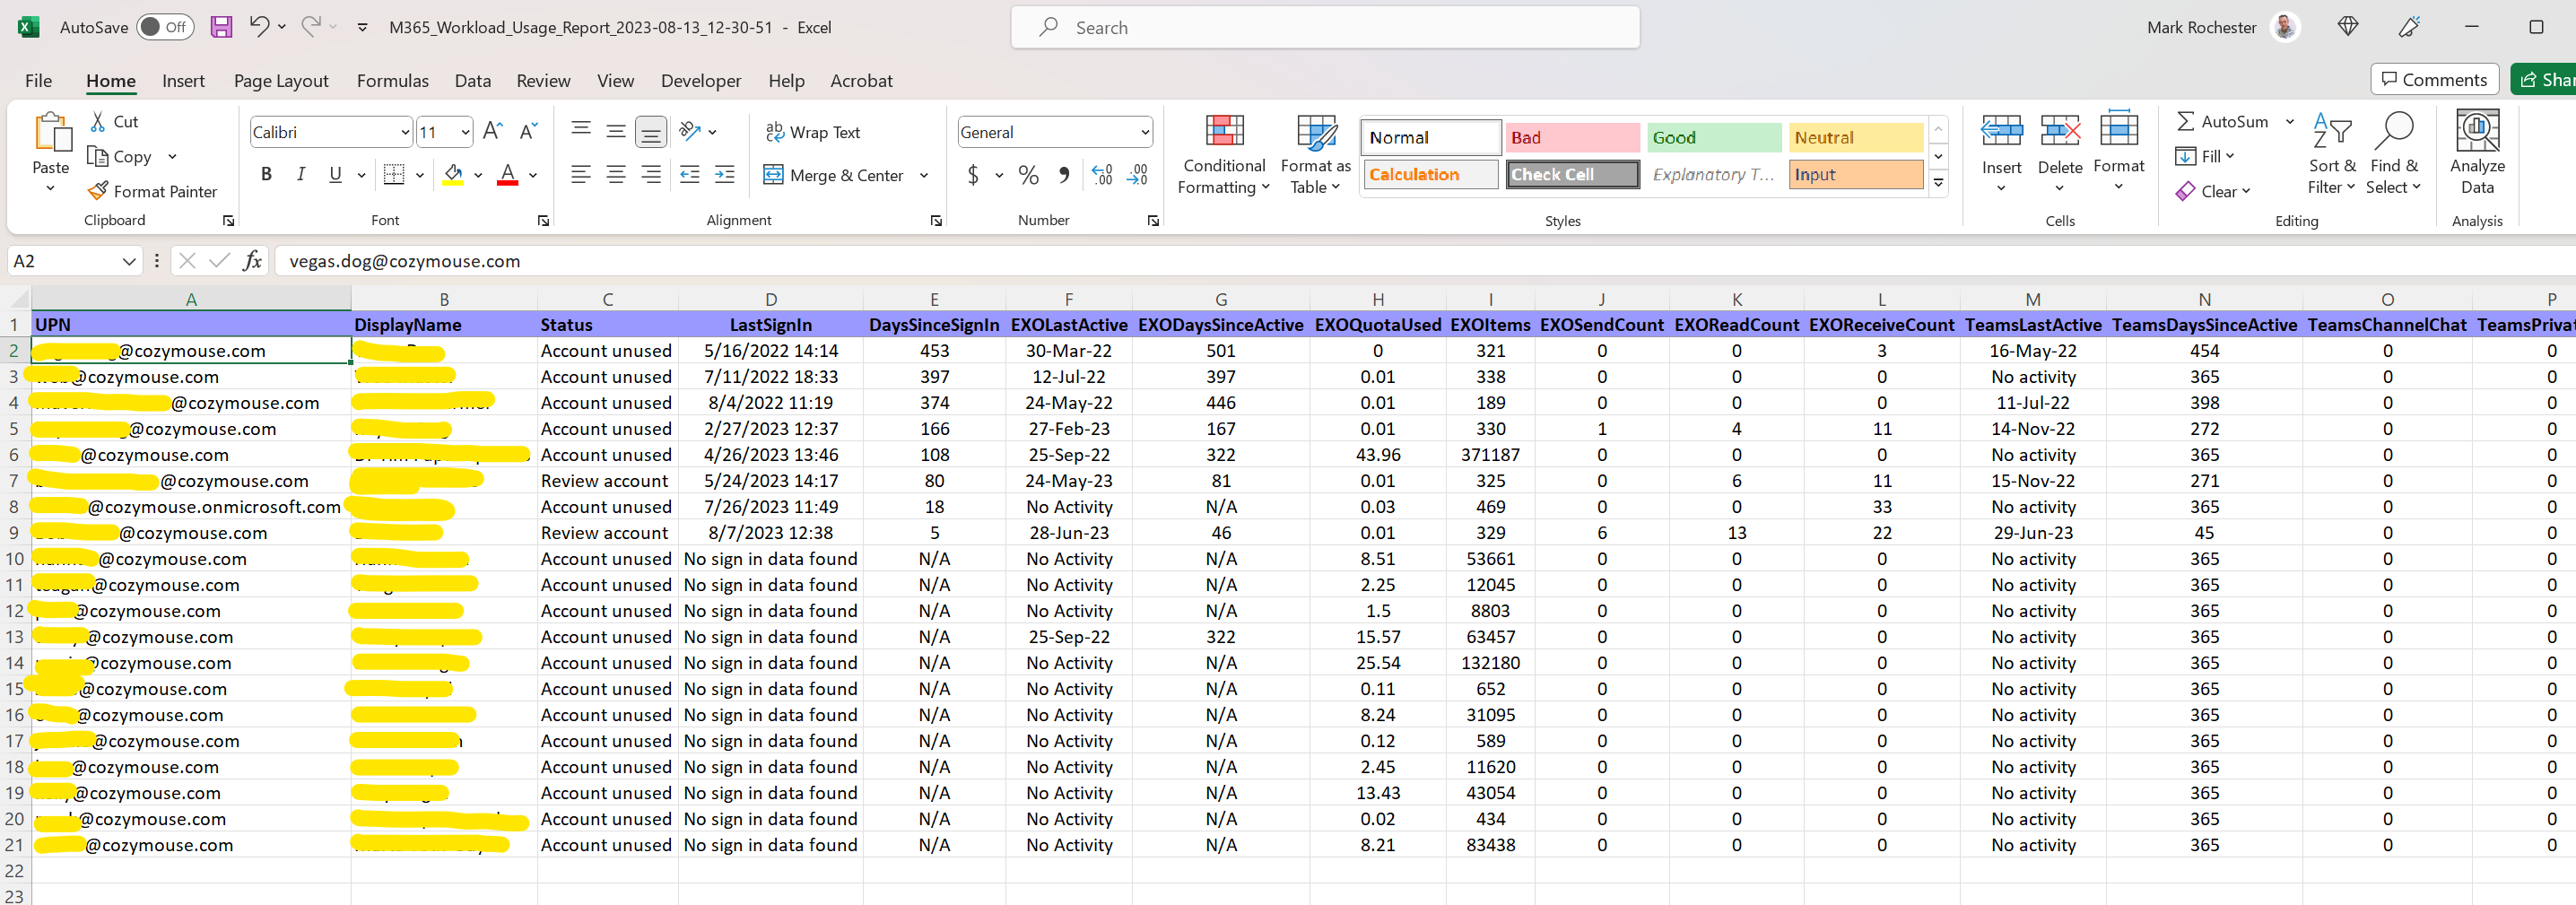
And of course, the Excel output gives a more functional view of all the data collected.
To find the script, just use this link to access the store location
https://store.thecloudgeezer.com
And remember to subscribe to the You Tube channel where I have a ton of content around Migrations and other Cloud related things.
https://youtube.com/thecloudgeezer
Mark – The Cloud Geezer