Thursday, April 25, 2024

Install Exchange 2019 – Part 3 – Install Mailbox Role

Now comes the easy bit! Once you have installed all the pre-requisites and updated the Active Directory correctly you can move on to installing the Exchange 2019 system itself.

My preference is always to use the command prompt and run the unattended installation. This way you can let it get on with the work rather than responding to the command cascade of ‘Next, Next, Next, Finish’ buttons! It’s obviously up to you, but here is the unattended version.

From the command prompt where you unpacked all the Exchange 2019 files from the ISO, run the following command as administrator.

.\setup /mode:install /role:mailbox /iacceptexchangeserverlicenseterms


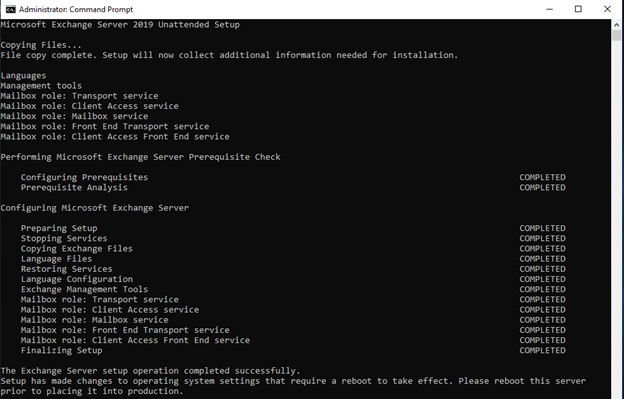
A reboot after this installation is clearly necessary. After which, move on to the configuration of your new Exchange 2019 server. Too Easy!

Mark Rochester
Mark Rochesterhttps://thecloudgeezer.com
Mark currently works in the cloud space assisting large companies to migrate from either on premises to the cloud, or cloud to cloud. His experience with Enterprise migrations spans more than 25 years which basically makes him old. However, with all the oldness creeping up he still finds technology massively exciting. Please reach out for a chat anytime you would like. :-)

Related Articles

Migrate Microsoft 365 Mailboxes to Google Workspace

This is not a very common subject to talk about as most of the migrations that get performed are people moving into the Microsoft...

Microsoft 365 Discovery Report

If you are working with a Microsoft 365 tenant, whether it is for your own or for a client, it is often necessary to...

Batches Paused in ‘Needs Approval’ Status

When you are using the native Microsoft tools to migrate from Google Workspace (Gmail) into Microsoft 365 the tool works very well. It does...

Stay Connected

88FansLike
36,999FollowersFollow
32,381SubscribersSubscribe
- Advertisement -

Latest Articles