Whether you are migrating to another tenant or simply want to get an idea of what is shared both internally and externally from users OneDrive’s, this can be a painful process. The M365 console isn’t exactly forthcoming with all that information as the reports only so you what is shared in the last few months.
What if we want a full and concise report of absolutely everything, the paths and filenames, is it shared either internally or externally, and who is it shared with. If a script here that is going to do that all for you. Creating a CSV file of all that data so you can report very effectively and just ‘know’ what is happening on your tenant.
To do all this we are going to use PowerShell as usual however this time we will use the Graph API and connect to a registered application in Azure to allow us to pull all the details out. We have a few tasks to do here.
https://store.thecloudgeezer.com/products/onedrive-external-reporting-script
- Create the app registration
- Grant it the appropriate permissions to read the OneDrive data
- Add the App ID and Client Secret to the application
- Run the script and view the output
I will take you through each step on what needs to be done and provide the final script also. Now as with all of the scripts, please feel free to update, modify, mess with, change, basically do whatever you want. If you want it to work a different way then go ahead and ‘You do you’!
Create App Registration
To do this, we need to access the Azure Active Directory inside your M365 tenant. Once in there, Click on ‘App Registrations’ and then ‘New Registration’ as shown in the screenshot here.

For the New Application, you can call it whatever you like. I have chosen the name ‘The Cloud Geezer OneDrive Report’. Keep all the default options here as shown.

In the following screen you will need to take a ‘copy’ of the Application ID and Directory ID as you will need to insert this into the script.

Grant the Application Permissions
Next step is to give the application the rights it needs to perform the work. Click on ‘API Permissions’ in the left hand listing.
In this screen, as shown below, you need to click on ‘Add a permission’ then ‘Microsoft Graph’ which is the large top box, then ‘Application Permission’. This will take you to the permission listing that you can see below.
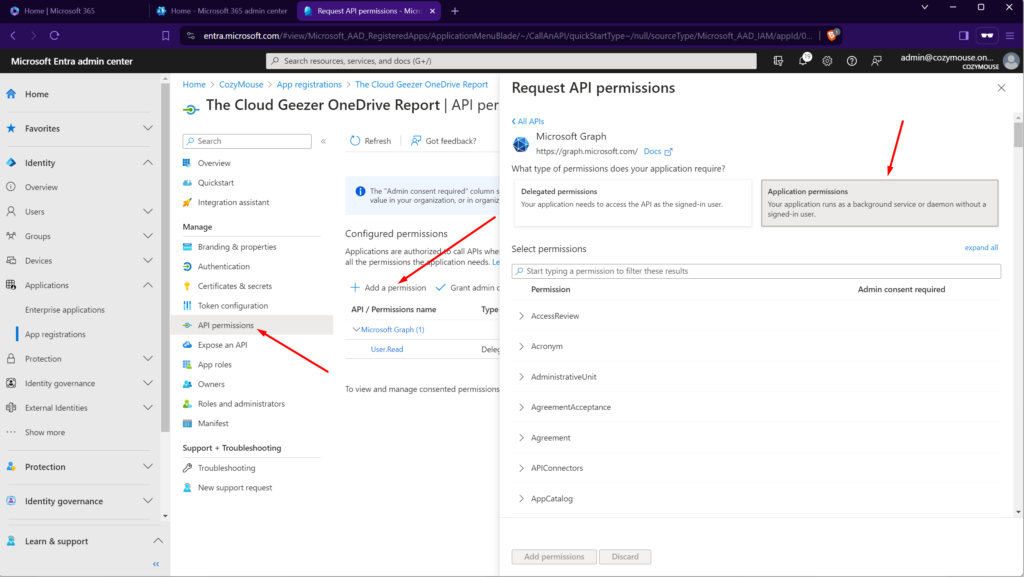
From the permissions to add you need to find these three.
- Directory.Read.All
- Sites.ReadWrite.All
- Users.Read.All
Click Add Permissions and then come back to the screen which should now be looking like this.
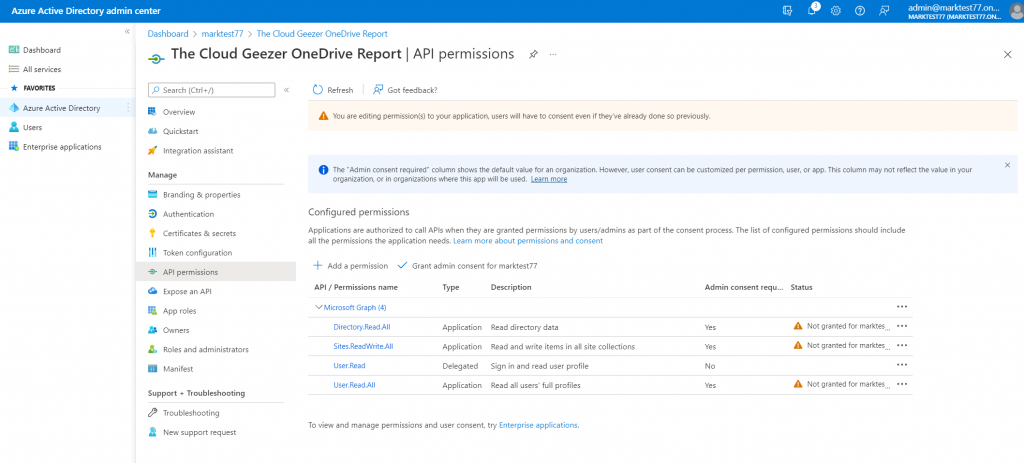
The next step is to Grant the Admin Consent to the permissions. Do that by clicking on the item in the middles that says ‘Grant Admin Consent’. Once this is done, your screen will look like this.
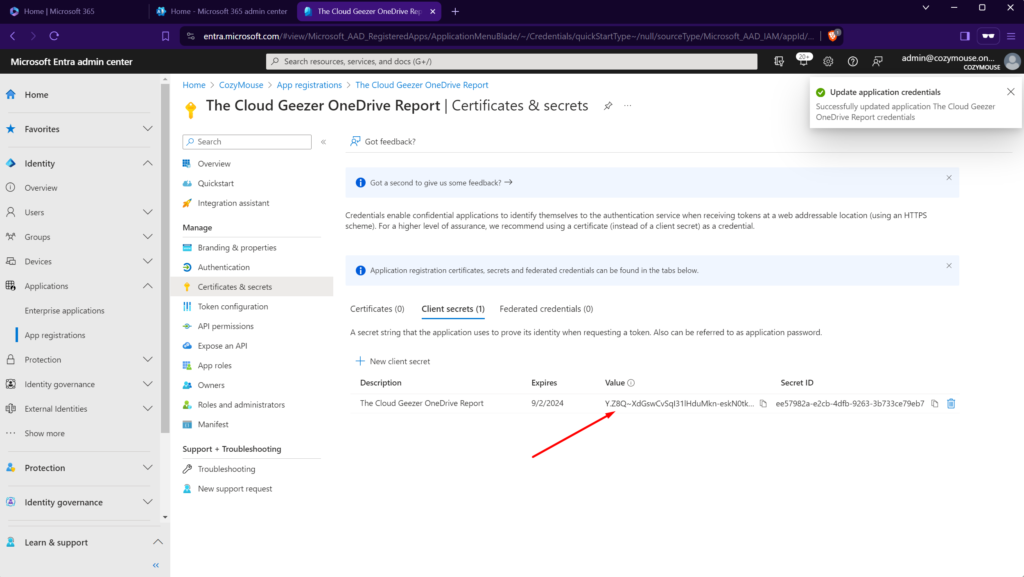
OK so we are nearly done. The last step is to add the “Client Secret” which is basically the password. Remember that once you create the secret and go back to the menu you are never going to see it again, so capture it in the screen as soon as you see it.
Click on ‘Certificates and Secrets’ from the left hand menu and then ‘New Client Secret’. Enter the details like below.

Once you ‘Add’ the secret, it will display, along with the secret itself. Grab this and copy it away so you can place it in the script.
Add the APP ID and Client Secret to the PowerShell Script
Now we are done inside Azure AD, you can run up PowerShell ISE now with Administrator rights as normal.
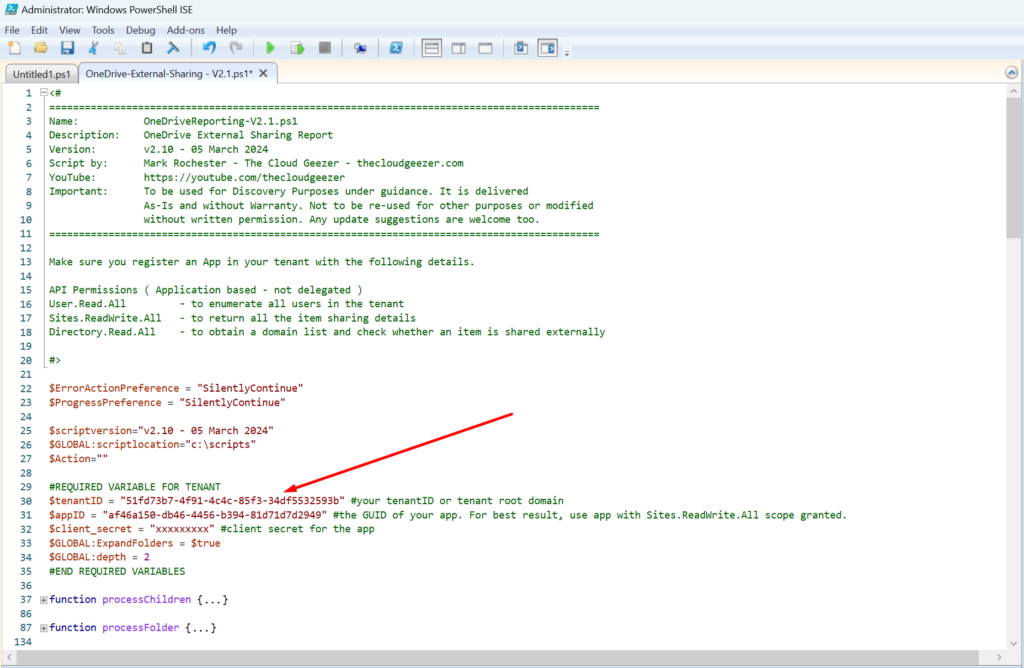
Once you have that loaded I would suggest you change directory to a local one other than c:\windows\system32 which is the default. But anyway, edit the script and place in the three details needed, the Tenant Name, the Application ID and the Client Secret, as shown below.
Run the Script and View the Output
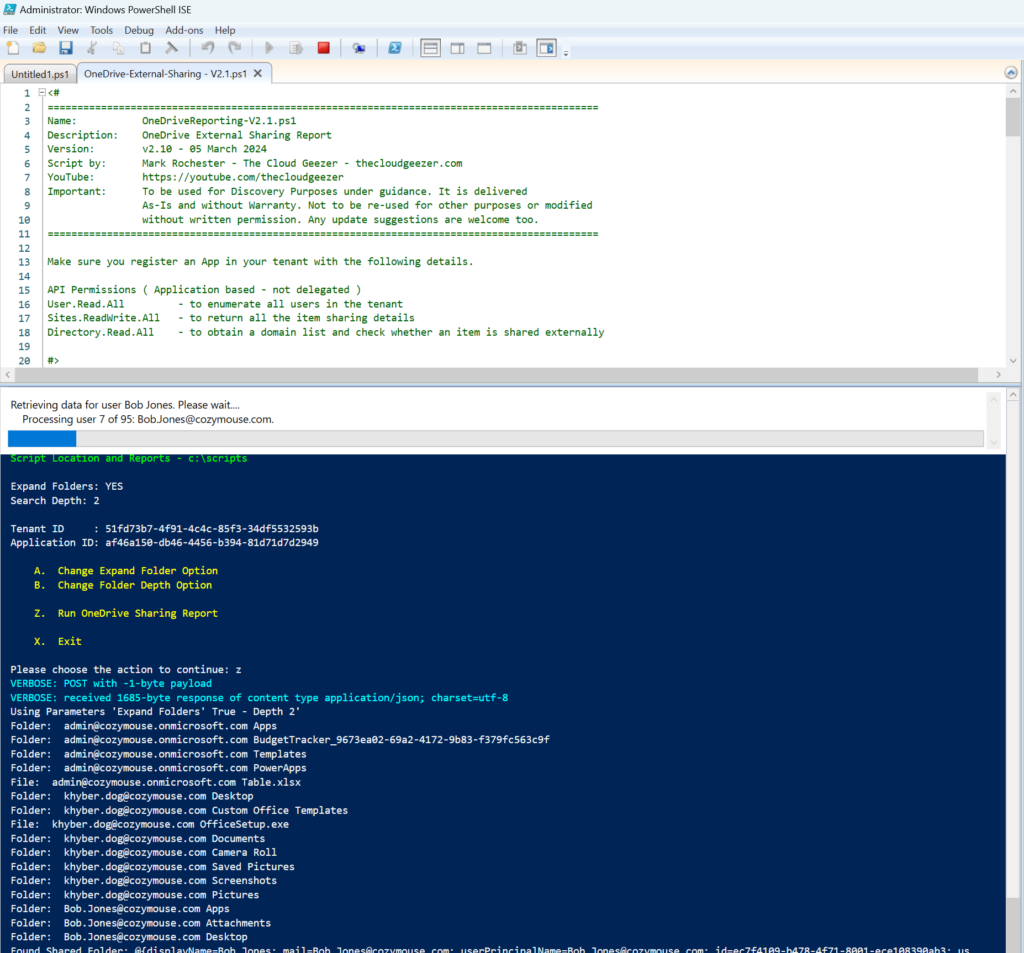
Now, just start the script and let it perform it’s magic! When running, if you have created the permissions correctly, it will run through all of the users, giving a status for each one.
The option to either expand the folders and what depth to look at is contained in the script itself and can be set in the menus when it is run.
Once completed, if there are Files/Directories that are Shared, then the ‘Output’ windows displays and you can see all of the data accordingly. If nothing is shared, then it simply ends.
The output window looks like this, and has customizable views and filtering capability. Handy if you are looking a particular user or file.

It does however create the CSV file showing all of the results it found, listing Folders and Files and showing if they are Shared/Not Shared, Internal/External.

All in all I have found this to be very useful in providing clients with a good amount of information in order to gain visibility in their own tenant.
To get this script download, you can find it in The Cloud Geezer store. Use this link to view it.
https://store.thecloudgeezer.com/products/onedrive-external-reporting-script
If you subscribe to my YouTube channel and then drop me an email to mark@thecloudgeezer.com, then I will send you a coupon code for a 50% discount.
https://youtube.com/thecloudgeezer
Use the product link above but apply the coupon at checkout.
Hope you find this useful, please reach out in the comments with any thoughts, comments or improvements you would like to see.
Mark – The Cloud Geezer.

